The EZVIZ X5C (ezNVR) is a wireless NVR that connects up to 8 Wi-Fi cameras to one hard drive with HDMI and VGA monitor outputs, and unlike the X5S, it’s also ONVIF-compliant so it can work with some non-EZVIZ IP cameras. This guide covers installing the drive, adding cameras, and the wireless range issues people run into most.
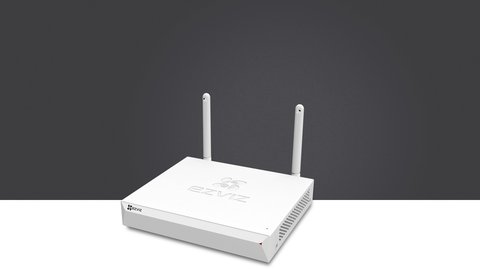
| Spec | Detail |
| Camera Capacity | Up to 8 Wi-Fi cameras, EZVIZ plus select ONVIF-compliant models |
| Storage Support | 1TB to 6TB hard drive, sold separately |
| Video Outputs | HDMI and VGA monitor outputs |
| Wireless Range | Roughly 100 meters without obstructions |
| Third-Party Support | ONVIF-compliant IP cameras (manual add) |
| Network | Ethernet port for internet/remote app access |
| App Access | EZVIZ app for remote live view and playback |
Installing the Hard Drive
The X5C ships without storage, supporting 1TB to 6TB drives purchased separately. Open the case, connect the drive to the internal SATA and power connectors, and screw it into the mounting bracket before closing the unit.
- Use a surveillance-rated hard drive for reliable 24/7 recording rather than a standard desktop drive
- Format the drive through the NVR’s on-screen menu after first boot, or it will not record
- Connect a monitor via HDMI or VGA before powering on so you can see the setup wizard

Adding Cameras to the X5C
The X5C connects up to 8 Wi-Fi cameras over its own wireless link, with a rated range of about 100 meters without obstructions. Go to Camera Management in the on-screen menu, select Add Camera, and power on each camera one at a time so the NVR can identify them individually.
- Add cameras one at a time rather than all at once to avoid pairing mix-ups
- Assign each camera a channel number matching its physical location
- For third-party ONVIF cameras, use the manual add option and enter the camera’s IP and credentials directly
Per Suresh N., who set up an X5C for a small retail space, “Being able to add a couple of third-party ONVIF cameras alongside our EZVIZ ones saved us from replacing hardware that was already working fine.”

Setting Up Motion Detection and Recording Schedules
Recording continuously on every channel fills a hard drive fast, so most people configure the X5C to record on motion for at least some cameras, saving continuous recording for a driveway or front entrance where nothing should be missed. The on-screen menu lets you set a separate recording mode per channel rather than forcing the same settings across all 8 cameras.
- Set high-traffic areas like a front door or driveway to continuous recording for the most complete footage
- Switch lower-priority cameras, like a backyard or side gate, to motion-triggered recording to save drive space
- Adjust motion sensitivity per camera if you’re getting too many false triggers from trees, shadows, or passing traffic
- Set a recording schedule so cameras only record during certain hours if 24/7 coverage isn’t needed
Storage estimates depend heavily on resolution and how many channels record continuously versus on motion, so it’s worth checking recorded footage after the first few days and adjusting settings if the drive is filling faster than expected.
Accessing Footage Remotely via the EZVIZ App
Connecting the X5C’s Ethernet port to your router adds remote access on top of local monitor viewing, letting you check any camera from the EZVIZ app while away from home. Add the NVR to the app the same way you would add a standalone camera, using the QR code on the unit or its serial number.
- Connect the NVR to your router with an Ethernet cable, separate from the wireless camera link
- Add the NVR as a device in the EZVIZ app using its serial number or QR code
- Browse recorded footage by channel and timestamp directly from the app’s playback screen
- Enable motion push notifications per channel if you want alerts sent to your phone
I set up an X5C for a small office with cameras covering the parking lot and back entrance, and remote playback through the app turned out to be the most-used feature day to day, letting staff check footage from home instead of driving in.
Common X5C Problems and Fixes
- Camera keeps dropping: move it closer to the NVR or add a Wi-Fi extender roughly halfway between them
- No recordings despite a drive installed: confirm the drive was formatted through the NVR menu, not just physically installed
- Third-party camera won’t add: double check it is genuinely ONVIF-compliant and not just IP-based, since not all IP cameras support ONVIF
- Remote app access fails: confirm the NVR’s Ethernet port is connected to your router with internet access, separate from the camera wireless link
- Hard drive fills up too quickly: switch lower-priority channels from continuous to motion-triggered recording and lower resolution on cameras that don’t need maximum detail
For full specs and ONVIF compatibility notes, see EZVIZ’s official X5C product page. EZVIZ’s X5C support page lists firmware updates and known third-party camera compatibility issues.
Frequently Asked Questions
What is the difference between the X5C and X5S?
The X5C supports ONVIF for some third-party cameras, while the X5S is EZVIZ-camera only. Both otherwise offer similar wireless NVR functionality.
Can I use a wired camera with the X5C?
The X5C is built around its own wireless link for EZVIZ cameras; it is not a PoE NVR for powering wired cameras directly.
Does the X5C need internet to record?
No, local recording and live viewing on a connected monitor work without internet. Remote app access needs the NVR online.
How many cameras can I add?
Up to 8 wireless cameras, combining both EZVIZ and compatible ONVIF third-party models.
Can I mix continuous and motion-triggered recording?
Yes, each channel can be configured independently, so some cameras record continuously while others only record on motion.
Conclusion
The EZVIZ X5C is a flexible choice if you want one NVR to manage several cameras, especially if you already own some non-EZVIZ ONVIF cameras worth keeping. Camera placement around the wireless range matters more than most people expect, so plan for that before mounting cameras far from the NVR.
Ryan is a Computer Science graduate with a long history of hands-on PC and network troubleshooting. He writes for softwaredriverdownload.com, covering driver fixes and smart home device setup guides.