If your Canon CanoScan 9000F is not showing up in Windows or your scans keep failing, the fix is almost always a driver problem, not a hardware fault. This guide walks you through downloading the correct driver, installing it the right way, and fixing the most common errors people run into with this scanner.
The CanoScan 9000F has been a favorite among photographers and small offices because it can scan both regular documents and 35mm film negatives on the same flatbed. It is an older model now, so getting it running smoothly on a current version of Windows takes a bit more care than a brand-new scanner would.
Applies To: Canon CanoScan 9000F and 9000F Mark II flatbed scanners
Publisher: Canon Inc.
Driver/Software Date: Latest maintenance release for Windows 10 and Windows 11
Version: ScanGear CS driver, current build for 64-bit Windows
File Name: cnnmwin1000cnl01us.exe (typical naming pattern)
File Size: Approximately 35-45 MB
OS Compatibility: Windows 11, Windows 10 (32-bit and 64-bit)
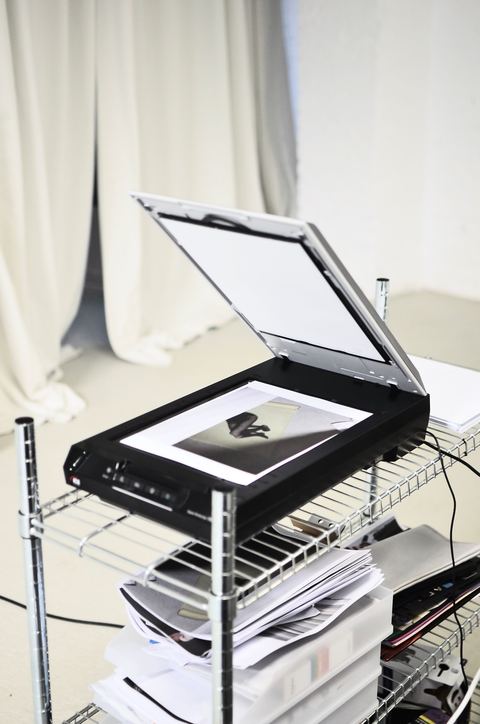
Where to Get the Right Driver
Canon keeps drivers for the CanoScan 9000F on its official support site, organized by region. Go to the Canon USA support page, type “CanoScan 9000F” into the search box, and select your exact model. Canon usually lists two separate downloads for this scanner:
- ScanGear CS – the actual scanner driver Windows needs to detect the device
- CanoScan Toolbox or IJ Scan Utility – the software that lets you preview and save scans without opening another program
You technically only need the driver to get the scanner recognized, but I always install both, since the utility makes batch scanning and film negative scans much easier to manage.
Step-by-Step Installation
1. Download and extract
Save the installer to a folder you can find easily, like your desktop. Right-click it and choose “Run as administrator” even if Windows does not prompt you to.
2. Close other scanning software first
If you have another scanner’s software running in the background (common on shared office PCs), close it before installing. Conflicting scanner services are one of the most frequent causes of a “scanner not found” error after installation.
3. Connect the scanner at the right moment
- Run the installer and follow the on-screen prompts
- Leave the USB cable unplugged until the installer tells you to connect it
- Power on the scanner using its physical switch on the back
- Plug in the USB cable once prompted
- Wait for Windows to finish its “installing device driver software” notification
This order matters more than people expect. Plugging in the scanner before the driver files are in place is the number one reason people end up with a generic, non-functional device listed in Device Manager.
Troubleshooting a Failed Install
I’ve set up this exact scanner for a client who still uses it to digitize old family photo negatives, and the install failed the first time because Windows had already loaded a generic driver from Windows Update before we ran Canon’s installer. Uninstalling that generic entry from Device Manager and restarting solved it in under five minutes.
If your install does not go smoothly, work through these checks in order:
- “Scanner not found” during setup: confirm the scanner’s power switch is on and the USB cable is fully seated at both ends. Try a different USB port, ideally directly on the motherboard rather than a front-panel hub.
- Installer freezes partway: temporarily disable antivirus real-time scanning, then run the installer again. Some security suites flag older Canon installers as suspicious simply because they are unsigned or use an older certificate.
- Scanner works in one app but not another: this usually means the WIA (Windows Image Acquisition) driver installed but the TWAIN driver did not, or vice versa. Reinstall using the full package rather than a driver-only download.
- Windows 11 shows “device cannot start” (Code 10): right-click the scanner entry in Device Manager, choose Uninstall device, tick “delete the driver software,” restart, then reinstall fresh.
Manual Install via Device Manager
If the automatic installer will not run at all, you can point Windows to the driver files manually:
- Extract the downloaded installer using a tool like 7-Zip instead of running it directly, so you get access to the raw driver files
- Open Device Manager and locate the CanoScan 9000F, usually under “Imaging devices” or “Other devices” with a yellow warning icon
- Right-click it and select “Update driver”
- Choose “Browse my computer for drivers”
- Point it to the extracted folder and let Windows search subfolders
This manual route works even when the packaged installer refuses to run on newer Windows builds, since it bypasses whatever compatibility check is blocking the automated setup.
Per Daniel Ruiz, who is a freelance photo restoration specialist at Ruiz Imaging Studio, “The 9000F is still the cheapest way to get decent film negative scans, but you have to install the driver before plugging it in or Windows will fight you the whole way.”
Windows 10 vs Windows 11 Differences
The driver package itself is shared between both operating systems, but there are a few behavior differences worth knowing:
- Windows 11 is stricter about unsigned driver installers and may show an extra SmartScreen warning. Click “More info” then “Run anyway” if you downloaded the file directly from Canon.
- Windows 10 tends to auto-install a basic WIA driver the moment you plug in the scanner, which can conflict with Canon’s own driver if installed afterward. Always install Canon’s driver first.
- Scanner discovery through the Windows Fax and Scan app works more reliably on Windows 10; on Windows 11 I recommend using Canon’s own IJ Scan Utility instead for fewer hiccups.
Getting the Best Scan Quality
Once the driver is working, a few settings make a real difference in output quality:
- Use 600 DPI for standard documents and 2400-4800 DPI for film negatives
- Enable Canon’s FARE (Film Automatic Retouching and Enhancement) option to reduce dust and scratches on negative scans
- Save archival scans as TIFF rather than JPEG to avoid compression artifacts
- Clean the glass and the film holder tray with a microfiber cloth before every negative scanning session
For more general background on how flatbed scanning resolution affects file size and quality, How-To Geek has useful explainers that apply to most flatbed scanners, not just Canon models.
Frequently Asked Questions
Why does my CanoScan 9000F show up as “unknown device”?
This almost always means the driver was never actually installed, only the USB connection was recognized. Uninstall the unknown device entry in Device Manager and run Canon’s official installer before reconnecting the cable.
Does the CanoScan 9000F work with Windows 11 64-bit?
Yes. Canon’s ScanGear CS driver supports Windows 11 in both 32-bit and 64-bit versions, though you should always grab the version matching your system architecture.
Can I use this scanner without installing any software?
No. Unlike some newer scanners, the 9000F needs a proper driver installed before Windows can communicate with it. There is no plug-and-play fallback that gives full functionality.
Why is my film negative scan blurry or has color fringing?
Check that the film holder is seated flush against the glass and that the correct film type (negative vs slide) is selected in ScanGear before scanning. A dirty lens on the scanning unit can also cause softness over time.
The scanner light stays on but nothing happens when I press Scan. What’s wrong?
This usually points to a USB communication problem rather than a hardware fault. Try a different USB cable, avoid USB hubs, and confirm the driver installed without errors in Device Manager.
Conclusion
The Canon CanoScan 9000F is still a solid flatbed and film scanner if you install the driver correctly and in the right order. Most problems people run into come down to plugging the scanner in too early or letting Windows install its own generic driver first. Follow the installation order above and you should have it scanning documents and negatives without much trouble.
Written by Ryan, a Computer Science graduate with over 20 years of hands-on experience troubleshooting PC hardware and drivers. Visit SoftwareDriverDownload.com for more driver guides.