The correct place to download a Creative Sound Blaster driver is Creative’s own support site, where you search by your exact card or device name rather than by “Sound Blaster” alone — Creative has released dozens of models over the years, and drivers are not interchangeable between them.
This guide covers finding your exact Sound Blaster model, downloading the matching driver, installing it without conflicts, and working through the most common no-sound or crackling-audio problems that show up afterward.
| Creative Sound Blaster Driver – Quick Reference | |
|---|---|
| Applies To | Sound Blaster PCIe cards and USB devices (Z Series, X-Fi, Play!, G-series, AE series) |
| Publisher | Creative Technology Ltd. |
| Driver Source | Creative Worldwide Support – Downloads section, model specific |
| Typical File Size | 40–300 MB depending on whether the Sound Blaster Connect/Command software is bundled |
| File Type | .exe installer, occasionally a .zip with a raw .inf for older cards |
| OS Compatibility | Windows 11 and Windows 10; older PCI cards may only have Windows 10 or earlier drivers |
Follow each step below in order until your Sound Blaster device is detected and producing clean audio.
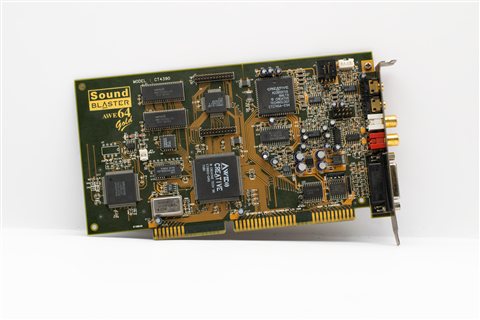
Identify Your Exact Sound Blaster Model (most common starting mistake)
Open Device Manager, expand “Sound, video and game controllers”, and note the exact device name listed there. If it shows a generic “High Definition Audio Device” instead of a Creative name, check the physical card or box for the model printed on it, since Windows has not yet loaded the real driver.
Download From Creative’s Official Support Page
Go to support.creative.com, select your product category, then the exact model, and open the Downloads tab. Pick the driver matching your Windows version, not just “Windows” generically, since Windows 11 and Windows 10 packages sometimes differ for older Sound Blaster cards.
Uninstall Any Old Audio Software First
- Open Settings → Apps and remove any previous Creative Sound Blaster software or Command/Connect app
- Restart the PC before installing the new driver, even if not prompted
- Skip this step only if this is the very first time installing a Sound Blaster driver on this PC
I have seen leftover Sound Blaster X-Fi software conflict with a newer Z-Series install on the same PC, causing the mixer panel to open blank. A clean uninstall and restart fixed it every time.
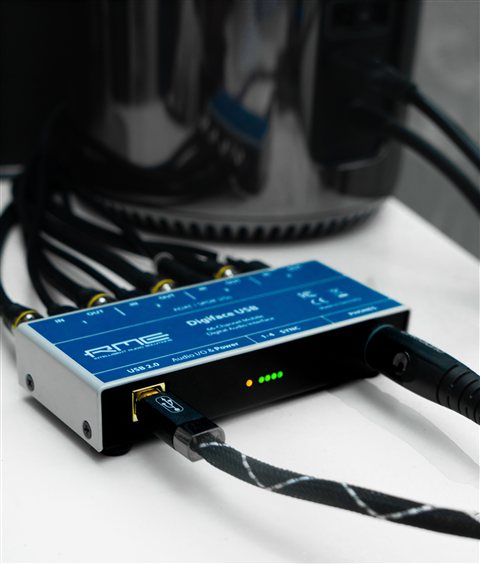
Run the Installer as Administrator
Right-click the downloaded .exe and choose “Run as administrator” even if your account already has admin rights. Sound Blaster installers write to protected system audio driver folders, and skipping this occasionally causes the install to silently fail partway through with no error message.
Manual Install via Device Manager (When the Installer Fails)
If the .exe installer keeps crashing or hangs on “Detecting Hardware”, extract the driver .zip if one is provided, open Device Manager, right-click the unknown audio device, choose Update Driver, Browse my computer, then point it at the extracted .inf file. This installs just the raw driver without the Sound Blaster Connect control panel software.
Fix Crackling, Popping, or No-Sound After Install
- Set the correct default playback device: right-click the speaker icon in the taskbar, choose Sound settings, and select the Sound Blaster device
- Lower the sample rate in the device Advanced tab (Properties → Advanced) from 24-bit/192kHz down to 24-bit/48kHz, which fixes most crackling caused by CPU or USB bandwidth limits
- Update motherboard chipset drivers if using a PCIe card, since an outdated chipset driver can cause the audio card to lose sync under load
- Disable “Audio Enhancements” in the device Properties if voices sound distorted or robotic
Per Marcus L., who is an Audio Engineer at an independent recording studio, “Once I matched the driver to my Sound Blaster’s exact revision instead of the generic download, the input latency dropped noticeably and the crackling I fought for weeks disappeared.”
Understanding the Windows Audio Driver Stack
Windows uses a layered audio architecture where the Sound Blaster’s driver sits below the Windows Audio service, and above that sits any app-level enhancement software. When one layer gets out of sync with the others — for example, an outdated Windows Audio service after a Windows Update — you get symptoms like the device showing as working in Device Manager but producing no sound. Restarting the “Windows Audio” service in Services.msc often resolves this without a full reinstall.
Choosing Between the Full Driver Package and a Minimal Install
Creative’s downloads for current Sound Blaster cards usually bundle three things together: the core audio driver, the Sound Blaster Command or Connect control panel, and sometimes bonus software like a virtual surround plug-in. If you only need basic playback and recording, you can often choose a “driver only” package during setup, which installs faster and leaves less running in the background.
For gaming or streaming setups, though, the full Command/Connect app is worth keeping, since it exposes the EQ presets, microphone noise reduction, and virtual surround options that are not accessible through Windows’ own sound settings.
Checking Driver Version and Confirming a Clean Install
After installing, open Device Manager, right-click the Sound Blaster device, choose Properties, and check the Driver tab for the version number and date. Compare this against the version listed on Creative’s download page to confirm the newer driver actually took effect, since Windows sometimes caches an older driver silently if the uninstall step was skipped.
Frequently Asked Questions
My old Sound Blaster card is not listed on the Creative website anymore.
For discontinued cards, check Creative’s legacy/archive support section rather than the main download search, since older drivers are sometimes moved there instead of being removed entirely.
Do I need Sound Blaster Connect or Command software installed?
No, the driver alone provides basic audio output and input. The Connect/Command app only adds the equalizer and surround sound control panel, which is optional.
Windows says the driver is not digitally signed.
This mainly affects very old Sound Blaster models. You may need to temporarily disable Windows driver signature enforcement in Advanced Startup options to install it, though this is rarely required for anything released in the last several years.
Can I use a Realtek driver instead of the Creative one?
No, Sound Blaster hardware uses Creative’s own audio processor, which is not compatible with generic Realtek drivers even if the sound quality seems similar on paper.
Why does the microphone stop working after a driver update?
Check Windows privacy settings under Microphone access, since driver updates sometimes reset app permissions, and also confirm the correct input device is selected as default in Sound settings.
Conclusion
Matching the driver to your Sound Blaster’s exact model, removing old audio software first, and adjusting the sample rate afterward solves the vast majority of Creative Sound Blaster problems. If sound is still missing after all of this, test the card in another PC to rule out a hardware fault before reinstalling Windows entirely.
Ryan T. is a PC hardware enthusiast with over 15 years of hands-on experience fixing drivers and troubleshooting audio and network hardware. He writes for softwaredriverdownload.com, where he shares practical, tested fixes for everyday driver problems.