The Asus Xonar DG driver is the audio software that lets Windows properly use this PCI sound card’s Dolby Headphone processing, GX 2.5 gaming audio engine, and 5.1 surround output instead of falling back to a generic Microsoft audio driver.
The Xonar DG has been a favorite budget sound card among PC gamers for a long time because it uses a dedicated C-Media CMI8786 chip instead of relying on the motherboard’s onboard codec. That gives cleaner audio and a real headphone amplifier, but only if the correct driver and Xonar DG Audio Center software are installed. I still keep one of these cards in an older desktop I use for retro gaming, and getting the driver right made a noticeable difference over the onboard sound.
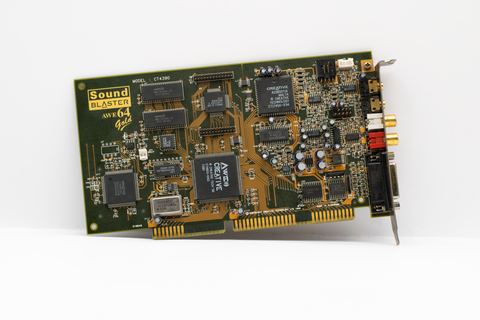
Applies To: ASUS Xonar DG PCI Sound Card
Author/Publisher: ASUSTeK Computer Inc.
Driver/Software Date: Latest driver from the ASUS support page
Version: Windows 10/11 driver package (varies by release)
File Name: Xonar_DG_VistaWin7Win8Win10_VXXXXXX.zip
File Size: Roughly 80-120 MB
OS Compatibility: Windows 10 and Windows 11 (32-bit and 64-bit)
Downloading the Right Driver Package
ASUS has not made a native Windows 11 driver for the Xonar DG in a long time, since the card is discontinued, but the last Windows 10 package still installs and runs correctly on Windows 11 in almost every case. Here is how to get it:
- Visit the ASUS Xonar DG support and download page.
- Select your operating system from the dropdown, choosing Windows 10 64-bit if you run Windows 11 64-bit, since there is usually no dedicated Windows 11 listing.
- Download the driver package, which comes as a ZIP file containing both the driver and the Xonar DG Audio Center control panel.
- Extract the ZIP to a folder you can find easily, such as your Desktop.
Installing the Driver
Before you start, make sure the Xonar DG card is already physically installed in a free PCI slot and your PC recognizes it as a sound device, even if audio is not working yet.
- Open the extracted folder and run the setup executable, usually named something like Setup.exe.
- Right-click it and choose “Run as administrator” to avoid permission errors partway through installation.
- Follow the on-screen instructions and accept the default settings unless you have a specific reason to change them.
- When the installer asks to restart your computer, allow it, since the audio drivers do not fully activate until after a reboot.
- After restarting, open the Xonar DG Audio Center from the system tray or Start menu to confirm the card is recognized and set your speaker configuration.
Per Ahmad Firdaus, who is a Network Administrator at a small ISP in Johor, “I still recommend the Xonar DG to anyone building a budget gaming PC who wants better sound than onboard audio, as long as they remember to grab the driver from ASUS directly instead of relying on Windows Update.”
Windows 10 and Windows 11 Behavior Differences
The driver itself was built for Windows 10, so a few quirks show up on Windows 11:
- Windows 11’s driver signature enforcement is generally fine with the Xonar DG package, but on some systems you may need to temporarily disable Secure Boot in your BIOS/UEFI if installation is blocked outright.
- The Xonar DG Audio Center sometimes fails to launch automatically at startup on Windows 11 and needs to be opened manually the first few times before it sticks.
- Windows 10 machines tend to install the driver with fewer issues since it matches the intended target OS.
Troubleshooting: When the Driver Installer Fails
If the setup program errors out, crashes, or the card still is not detected afterward, work through this list:
- Confirm the card is seated properly. Power down, unplug the PC, and reseat the Xonar DG firmly in its PCI slot. A loose card is one of the most common causes of “device not detected” errors.
- Disable the onboard motherboard audio in BIOS. Sometimes Windows gets confused when both the onboard codec and the Xonar DG are active, and disabling onboard audio in the BIOS/UEFI settings clears the conflict.
- Remove old audio drivers first. Open Device Manager, expand Sound, video and game controllers, uninstall any existing Xonar entries along with “Delete the driver software,” then reinstall fresh.
- Turn off driver signature enforcement temporarily if you get a “Windows cannot verify the publisher” error, following Microsoft’s documented steps for advanced startup options.
- Update your motherboard’s chipset drivers first, since an outdated chipset driver can sometimes prevent PCI devices from initializing correctly.
Manual Installation Through Device Manager
If the automatic setup keeps failing, you can install the driver manually by pointing Windows to the INF file inside the extracted folder.
- Extract the downloaded ZIP file if you have not already, and note the folder location.
- Open Device Manager and look for the Xonar DG under “Sound, video and game controllers” or under “Other devices” if it shows a warning icon.
- Right-click the entry and select “Update driver,” then “Browse my computer for drivers.”
- Browse to the extracted driver folder and let Windows scan it for a matching .inf file.
- Confirm the install and restart your PC once it completes.
This manual method saved me once when the graphical installer kept freezing halfway through on an old Windows 10 build. Pointing Device Manager straight at the extracted folder worked within a minute where the installer had failed three times in a row.
Common Post-Install Issues
- No sound from rear speakers only: Open Xonar DG Audio Center and confirm the correct speaker configuration (2, 4, 5.1) matches your physical setup under the Main tab.
- Crackling or popping audio: Lower the sample rate in Audio Center from 96kHz to 48kHz, which resolves buffer issues on many systems.
- Headphone amp too quiet or too loud: Adjust the headphone amplifier gain setting inside Audio Center rather than relying only on Windows volume, since the card has its own hardware amp stage.
- Card disappears after Windows Update: Windows Update occasionally overwrites the ASUS driver with a generic one. Reinstall the official driver and, if it keeps happening, right-click the device in Device Manager and disable automatic driver updates for that device specifically. See this Tom’s Hardware community for more reports on this exact behavior.
Frequently Asked Questions
Is there an official Windows 11 driver for the Xonar DG?
ASUS never released a driver labeled specifically for Windows 11 since the card was discontinued before Windows 11 launched, but the Windows 10 64-bit package installs and runs correctly on Windows 11 for almost everyone.
Why does Windows say the driver is unsigned?
Older ASUS driver packages sometimes use certificates that Windows no longer trusts by default. You may need to temporarily disable driver signature enforcement through Windows Advanced Startup to get past this warning.
Can I run the Xonar DG alongside my motherboard’s onboard sound?
Technically yes, but it often causes conflicts and confusion about which device is the default. We recommend disabling onboard audio in BIOS if you plan to use the Xonar DG as your primary sound card.
What is the difference between the Xonar DG and Xonar DGX?
The DGX is a PCI Express version of the same card, while the DG uses the older PCI slot. They share very similar drivers and the same Audio Center software, so download instructions are almost identical.
My PC does not detect the card at all in Device Manager. What now?
This points to a hardware or slot issue rather than a driver problem. Reseat the card, try a different PCI slot if your motherboard has more than one, and check that your power supply provides enough wattage for all installed components.
Conclusion
The Asus Xonar DG still holds up well as an affordable upgrade over onboard audio, but only once its driver and Audio Center software are properly installed. Grab the Windows 10 driver package directly from ASUS, install it as administrator, and fall back on the manual Device Manager method if the installer misbehaves. Once it is running, the difference in sound clarity compared to onboard audio is easy to hear.
This guide was written by Ryan, a Computer Science graduate who has spent two decades building, repairing, and troubleshooting PCs and their driver quirks. Find more driver guides at softwaredriverdownload.com.