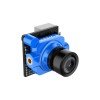
The Foxeer Arrow Micro Pro is a 19mm analog CCD FPV camera with a built-in flight-data OSD and a wide input-voltage range. Wire power, ground and video carefully, then use the programming board to set PAL or NTSC and adjust the image.
I wired an Arrow Micro Pro camera into a small build and the OSD menu would not respond to the joystick until I confirmed the camera control cable was connected to the correct pad rather than the video output pad.
The Arrow Micro Pro is an older analog camera, but it remains useful for repairs and lightweight builds. This guide explains its Sony CCD sensor, built-in voltage and timer display, flight-controller OSD interaction and the common faults that produce a black or rolling image.
Why problems happen
What makes the Arrow Micro Pro different
Many modern analog cameras use CMOS sensors and depend on the flight controller for all OSD data. The Arrow Micro Pro uses a CCD sensor and includes its own simple flight OSD. It…
How to correct them
Identify the correct cable and pins
The camera needs positive power, ground and composite video output. Some harnesses also include wires for the programming board or voltage sensing. Do not connect by colour alone…
Basic wiring through a flight controller
Connect camera positive to a clean regulated pad or a supported supply. Connect camera ground to a nearby flight-controller ground. Connect camera video output to the FC pad…
Key specifications
| Item | Details |
|---|---|
| Sensor | Sony 1/3-inch CCD with Nextchip DSP |
| Resolution | 600TVL colour, higher in black-and-white mode |
| Video output | CVBS analog |
| Lens options | 1.8mm or 2.1mm |
| Input voltage | 5V to 40V according to Foxeer |
| Built-in flight OSD | Name, voltage and timer |
| Body size | 19 × 19mm |
| Weight | About 5.3g without cable |
What makes the Arrow Micro Pro different
Many modern analog cameras use CMOS sensors and depend on the flight controller for all OSD data. The Arrow Micro Pro uses a CCD sensor and includes its own simple flight OSD. It can display a name, supply voltage and timer even when no Betaflight OSD chip is used.
This built-in OSD is separate from Betaflight OSD. If both are enabled, the screen can become crowded or the text can overlap. Decide which system should display voltage and timer information before changing settings.
Identify the correct cable and pins
The camera needs positive power, ground and composite video output. Some harnesses also include wires for the programming board or voltage sensing. Do not connect by colour alone when the cable is not original.
Read the labels beside the connector or use the official pin diagram. A replacement plug can physically fit while placing battery voltage on the video pad.
- Confirm positive and ground with a multimeter.
- Use continuity mode to trace the video wire.
- Keep the video ground tied to the same ground reference as the VTX.
- Insulate unused menu or sensing wires.
Basic wiring through a flight controller
- Connect camera positive to a clean regulated pad or a supported supply.
- Connect camera ground to a nearby flight-controller ground.
- Connect camera video output to the FC pad marked CAM, VIN or VIDEO IN.
- Connect the FC video output to the VTX video input.
- Power the VTX from a rail suitable for that exact transmitter.
The normal signal path is camera → flight-controller analog OSD → video transmitter → goggles. For testing, connect the camera video directly to the VTX. If the direct connection works, the camera and VTX are probably healthy and the fault is inside the FC video path.
Use the camera programming board
Connect the small joystick or programming board only while power is off. Enter the camera menu and change one setting at a time. Save before disconnecting power.
Useful settings include PAL or NTSC, brightness, contrast, digital WDR, day/night behaviour and the built-in flight OSD. Restore defaults when a second-hand camera has extreme colours or unreadable exposure.
| Setting | What it changes | Practical starting point |
|---|---|---|
| PAL/NTSC | Video timing and frame format | Match the goggles and DVR |
| DWDR | Balance between bright sky and dark ground | Enable, then test outdoors |
| Day/Night | Colour or black-and-white behaviour | Auto for mixed use |
| Flight OSD | Camera name, voltage and timer | Disable duplicates if Betaflight OSD is used |
Power-supply choices
Foxeer lists a broad 5V to 40V input range, but clean power is still important. A wide voltage rating does not protect the image from motor noise or ground problems.
A regulated camera pad is usually the easiest option. If the camera is powered from battery voltage, confirm the maximum battery voltage, check polarity and keep the video wiring away from high-current motor leads.
Built-in voltage display accuracy
The camera OSD can show voltage only when the correct sensing connection is used. If it is powered from a regulated 5V pad, the displayed value may represent that rail rather than the flight battery.
Do not use the camera voltage reading as the only low-battery warning until it has been compared with a multimeter and the flight controller. A wrong sensing wire or menu scale can produce a believable but incorrect number.
Common Arrow Micro Pro problems
| Screen symptom | Likely cause | First check |
|---|---|---|
| Black screen with flight OSD | Camera power or camera-video wire | Measure voltage at the camera and inspect the CAM pad |
| Static with no OSD | VTX, antenna, channel or receiver | Confirm VTX power and manually match band and channel |
| Rolling image | PAL/NTSC mismatch or poor ground | Match the format and inspect the video ground |
| Lines when motors spin | Electrical noise | Use regulated power and check the main capacitor |
| Image too dark | Exposure or WDR setting | Restore defaults before changing one setting at a time |
A black screen with Betaflight text still visible means the VTX and FC output are working. Focus on camera power, camera ground and the wire entering the FC camera pad.
A camera image with no Betaflight OSD means the camera and VTX path is active, but the FC OSD may be disabled, bypassed or damaged. Confirm that video actually passes through the FC rather than directly to the VTX.
When replacement is the better fix
A camera that repeatedly changes colour, loses sync after warming up or draws unusual current may have internal damage. Inspect the connector and lens first, but do not keep increasing supply voltage to revive an unstable camera.
Because the Arrow Micro Pro is an older design, a current micro analog camera may be cheaper than repairing a damaged board. Keep the Arrow when its CCD image, built-in OSD or existing frame fit is important.
Sources and further reading
Conclusion
Wire the camera by pad label, use clean power and diagnose the video path from camera to FC, VTX and goggles. The screen symptom usually identifies the failed stage faster than replacing several parts at once.
Frequently Asked Questions
Is the Arrow Micro Pro digital?
No. It outputs standard CVBS analog video and needs an analog VTX and receiver.
Can it run from battery voltage?
Foxeer lists a wide input range, but verify the exact camera label and maximum charged battery voltage before using direct battery power.
Why do I see two voltage readings?
The camera has its own flight OSD and the flight controller may add another OSD. Disable the duplicate item in one system.
What is the difference between the 1.8mm and 2.1mm lens?
The 1.8mm option gives a wider view, while the 2.1mm lens is narrower and makes distant objects appear larger.
Why is the picture black but OSD text remains?
The FC and VTX are transmitting, but the camera signal is missing. Check camera power and the CAM input wire.
Ryan has built and repaired dozens of camera drones and gimbals over the years, learning that reading the exact manual for the exact hardware revision saves more headaches than any generic guide. He documents these lessons at softwaredriverdownload.com.