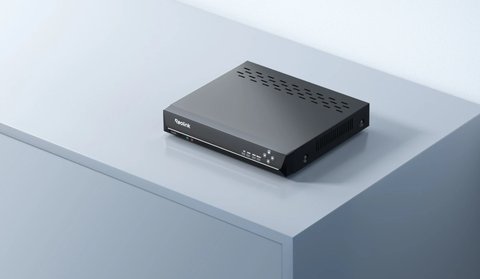
A Reolink NVR handles remote access, adding new cameras, and renaming channels through the same Reolink app used for standalone cameras, though the menus sit one level deeper since you’re managing a multi-camera system rather than a single device. Here’s how each task actually works.
| Task | Where to Do It |
|---|---|
| Remote access | Reolink app, via Cloud/P2P, no port forwarding needed |
| Add a camera | NVR Device Settings > Camera Management > Add Camera |
| Rename a channel | Channel’s own Device Settings > name/label field |
| Connection type | PoE, power and data over one Ethernet cable |
| Compatibility check | ONVIF support required for non-Reolink cameras |
Accessing the NVR Remotely
- Open the Reolink app and select the NVR from your device list
- The app connects via Reolink Cloud/P2P automatically when you’re away from the home network, without manual port forwarding
- All connected camera channels appear in the same multi-view layout as when accessed locally
- If Cloud/P2P access fails, check that the NVR still has an active internet connection at home
Adding a New Camera to the NVR
- Connect the new PoE camera to an open port on the NVR using an Ethernet cable
- Open the NVR’s device settings in the app, or use the on-screen menu if a monitor is connected
- Select Camera Management, then Add Camera, and the NVR should detect the new device automatically
- Confirm the channel number matches the camera’s physical location for easier reference later

PoE NVRs are genuinely simpler here than Wi-Fi setups — since the camera draws both power and network connection from the same cable plugged into the NVR, there’s no separate Wi-Fi pairing step to fumble through like there is with standalone wireless cameras.
Changing a Camera’s Name on the NVR
- Open the specific camera channel within the NVR’s device view
- Go to that channel’s Device Settings and find the name or channel label field
- Enter a location-based name, like “Driveway” or “Back Gate,” and save
- The updated name syncs across the app immediately for anyone with access to that NVR
For full NVR configuration details, see Reolink’s official support center.
Setting Up Multi-Camera Views
Once more than one camera is added, the app lets you arrange channels into custom layouts rather than sticking with a default grid. This is worth setting up deliberately rather than leaving at defaults:
- Open the multi-view screen and drag channels into the order that matches how you actually want to monitor them, front entry and driveway first if those matter most
- Save multiple custom layouts if you regularly switch between a full overview and a focused view of one or two channels
- Enable sequence/cycle mode if you want the display to rotate automatically through channels rather than manually switching
- Test the layout during both daytime and nighttime conditions, since infrared night views can look different enough to affect how useful a given arrangement is after dark
Managing User Permissions for Remote Access
If more than one person needs access to the NVR, whether family members or a small business team, the app supports adding sub-accounts with limited permissions rather than sharing the main login:
- In the NVR’s device settings, look for User Management or a similarly labeled permissions menu
- Create a new user and choose which channels they can view, since not everyone needs access to every camera
- Decide whether the new user can also control features like PTZ movement or two-way audio, or only view footage
- Remove or adjust access promptly when someone no longer needs it, rather than leaving stale accounts active indefinitely
Common Problems and Fixes
A few issues come up often enough with NVR management that they’re worth covering directly:
- Remote access won’t connect while away from home — confirm the NVR still has power and an active internet connection at home first, since this is the most common cause, well ahead of any app-side issue.
- New camera isn’t detected during Add Camera — check the Ethernet cable and PoE port physically, and try a different port on the NVR to rule out a faulty connection before assuming the camera itself is defective.
- Channel name changes don’t sync to all devices — force-close and reopen the app on other devices, since name updates sometimes need a manual refresh rather than appearing instantly everywhere.
- Multi-view layout resets unexpectedly — this can happen after a firmware update; resave your preferred layout once you confirm the update completed successfully.
- Sub-account can’t see a channel it should have access to — double-check the permission was actually saved under that specific user, since permissions are set per-channel and a partial save is an easy mistake to miss.
Frequently Asked Questions
Do I need port forwarding for remote NVR access?
No, Reolink’s Cloud/P2P relay handles remote access without manual port forwarding for most home setups.
Can I add a non-Reolink camera to the NVR?
Only if the NVR and camera both support ONVIF compatibility; check your specific NVR model’s supported device list first.
Does renaming a camera affect its recorded footage labels?
No, existing recordings stay associated with the channel; only the display name changes going forward.
How many cameras can one NVR support?
This varies by model; check your specific NVR’s channel count and supported camera combinations in its product specifications.
Organizing Channels as Your Camera Count Grows
Renaming channels is easy enough with two or three cameras, but the naming scheme matters more once a system grows past five or six. Instead of generic labels like “Camera 1” or “Camera 2,” using a consistent location-first naming pattern — such as “Front Yard” or “Garage Interior” — makes the live view grid and playback timeline far easier to scan at a glance, particularly if you are checking footage quickly from a phone rather than sitting at a monitor.
It is also worth periodically reviewing which cameras actually need remote access enabled. Not every channel needs to be reachable outside the home network; a camera pointed at a low-traffic side yard, for instance, can often stay on local-only viewing while higher-priority entry points keep remote access active. Trimming remote access down to only the channels that need it reduces the load on your NVR’s upload bandwidth and can noticeably improve the responsiveness of the cameras you do check remotely on a regular basis.
Conclusion
Remote access, adding cameras, and renaming channels on a Reolink NVR all happen through the same familiar app used for standalone cameras, just one menu level deeper. Once you’ve done it once, expanding or reorganizing the system becomes routine.
Ryan writes hands-on setup and troubleshooting guides for softwaredriverdownload.com, drawing on years of personally testing the devices he covers.