The Foxeer Razer Nano is a 14 x 14mm analog FPV camera designed for small frames. It sends a 1200TVL CVBS signal and normally needs only positive power, ground and one video connection.
I fit a Razer Nano into a very tight micro build and the tiny size made routing the camera cable without strain more difficult than expected. Adding a small strain relief loop near the connector prevented a future solder joint failure.
The official product page sells different PAL or NTSC and 4:3 or 16:9 options. These choices may be fixed by the ordered version, so select the correct combination before buying.
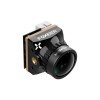
Razer Nano specifications
| Item | Specification |
|---|---|
| Sensor | Sony 1/3-inch CMOS |
| Resolution | 1200TVL |
| Output | CVBS analog |
| Aspect | 4:3 or 16:9 option |
| System | PAL or NTSC option |
| Input | 5V to 17V |
| Body | 14 x 14mm |
| Weight | About 3.9g excluding cable |
The 1.8mm M8 lens provides a wide view suited to compact quads. The official page lists horizontal field of view around 125 degrees, while the diagonal value changes with aspect ratio.
The camera weighs only a few grams, but the cable and mounting bracket add weight. On a very small build, keep the cable only as long as needed while leaving enough slack for camera tilt.
Choose the correct version
Check both aspect ratio and video system. A 4:3 camera is usually preferred on 4:3 racing goggles because it shows more vertical area. A 16:9 version fills a widescreen display without stretching.
PAL and NTSC affect frame timing and OSD layout. When the camera format and flight controller setting do not match, the picture may roll or the OSD may be displaced.
Wiring the Foxeer Razer Nano
- Verify the ordered aspect ratio and video system.
- Check positive, ground and video labels.
- Connect positive to a regulated 5V or suitable camera pad.
- Connect ground to a stable common ground.
- Connect video through the FC for OSD or directly to the VTX.
- Test before fixing the camera into the frame.
The official input range is 5V to 17V. Use a regulated 5V or camera output when possible. Do not connect a battery directly unless its maximum fully charged voltage stays within the camera limit.
For Betaflight OSD, route the camera video through the flight controller. For a simple direct setup, connect camera video to the VTX input. A direct link is also useful for troubleshooting.
Mounting a nano camera safely
Use a nano bracket that holds the sides without pressing on components. Confirm that the lens does not extend past the protection of the frame, but also make sure the frame is not visible in the corners.
Route the cable away from props, motor bells and sharp carbon edges. Secure it with a small tie or soft adhesive point. Do not pull tightly on the camera connector.
Set the angle while viewing the live feed. Tighten both sides evenly so the camera does not twist after the first landing.
Initial test
- Attach the VTX antenna.
- Power through a smoke stopper.
- Confirm a stable image at idle.
- Check aspect ratio and OSD alignment.
- Move the camera cable and watch for intermittent faults.
- Run motors slowly and check for noise.
Keep props removed. A nano build has little space, so a squeezed wire or short against carbon is easy to miss after final assembly.
Razer Nano troubleshooting
| Symptom | Most likely area | First action |
|---|---|---|
| OSD but no image | Camera power/video | Measure at camera connector |
| Static | VTX/receiver | Check channel and antenna |
| Rolling | Format/ground | Match PAL/NTSC and inspect ground |
| Lines under load | Electrical noise | Check BEC and capacitor |
| Blurry after crash | Lens focus | Clean and refocus |
Black screen with OSD
Measure camera voltage and confirm video reaches the CAM pad. Inspect tiny solder pads for lifted copper or bridges. Directly connect the camera video to the VTX to isolate the flight controller.
Static or no receiver lock
Check VTX power, antenna, band and channel. The camera cannot create full RF static by itself because it only produces baseband video.
Image rolls after arming
Check common ground and electrical noise. The camera may work at idle but lose a stable reference when motor current rises.
Image is blurry after a crash
The lens may have moved. Clean it, check for cracks and carefully refocus while watching the live image. Retighten the retaining ring after focus is correct.
Cable and connector checks for nano builds
Nano frames place the camera cable close to carbon, motor wires and spinning parts. Inspect the full cable path under bright light before the final assembly. A wire can look intact while the conductor is broken inside the insulation near the connector.
Use continuity mode with the battery disconnected. Check each camera wire from the camera plug to the flight-controller pad. There should be continuity on the intended line and no short between positive, ground and video. Flex the cable gently during the test because intermittent breaks may appear only when the camera is tilted.
Carbon fibre is conductive. Do not leave exposed solder joints or connector pins pressed against the frame. Use heat-shrink, a printed mount or a small insulating layer without trapping heat around the camera board.
After reassembly, move the camera through its full tilt range while watching the goggles. If the picture cuts out, the cable is too tight or the connector is loose. Correct this before flight because vibration can turn a small intermittent fault into a complete video loss.
Conclusion
The Foxeer Razer Nano is suitable for lightweight analog builds when the ordered aspect ratio and video system match the goggles. Clean power and careful cable routing are important because the small frame puts wires close to noisy components.
When the image fails, separate the camera, flight-controller video path and VTX instead of changing every setting at once.
Sources
Frequently Asked Questions
What size is the Foxeer Razer Nano?
The official body size is 14 x 14mm.
What is the input voltage?
The official page lists 5V to 17V.
Can the aspect ratio be changed?
The product is sold in 4:3 and 16:9 options. Treat the ordered option as fixed unless your exact camera menu provides switching.
Does it need a driver?
No. It is an analog CVBS camera.
Why is the picture rolling?
Check PAL or NTSC matching, ground continuity and power noise.
Ryan has spent considerable time cross-referencing manufacturer spec sheets against real-world hardware, a habit he brings to every guide at softwaredriverdownload.com.