The Foxeer Predator 5 is an analog FPV camera family, so it does not need a Windows driver or mobile app. It produces a CVBS video signal after it receives the correct power, ground and video connections.
I set the exposure mode on a Predator 5 camera to auto for a bright outdoor flight and the image washed out in direct sun. Switching to a fixed exposure setting for that lighting condition gave a much more usable picture.
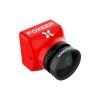
The important first step is to identify the exact Predator 5 body size. Foxeer sells Nano, Micro and Mini versions, and there is also a full-cased 19mm version with a larger M12 lens. The basic image system is similar, but the dimensions, weight, lens and mounting method are not identical.
Diagnostic timeline
Identify the correct Predator 5 version
The general Predator 5 name can refer to several cameras. The Nano version uses a 14mm body and can be fitted to a 19mm bracket. The Micro version uses a 19mm body, while the Mini version uses a 22mm body. The full-cased 19mm…
What the main specifications mean
The Predator 5 uses a Sony 1/3-inch CMOS sensor and sends a 1000TVL CVBS analog signal. Its 4:3 and 16:9 modes are switchable, and PAL or NTSC is also switchable. The camera includes Super WDR, noise reduction and several scene…
How to wire the Foxeer Predator 5
Most installations use three essential camera connections. Wire colour is helpful, but the labels on the PCB and flight controller are the final reference. Positive: connect to a clean regulated output inside the camera range.…
Configure aspect ratio, video format and scene mode
Start with the camera and goggles set to the same aspect ratio. A 4:3 image shown on a forced 16:9 display looks stretched. A 16:9 image shown on 4:3 goggles may look compressed or cropped. PAL and NTSC also affect the OSD canvas…
Identify the correct Predator 5 version
The general Predator 5 name can refer to several cameras. The Nano version uses a 14mm body and can be fitted to a 19mm bracket. The Micro version uses a 19mm body, while the Mini version uses a 22mm body. The full-cased 19mm model uses an M12 1.7mm lens and has a wider published field of view.
| Version | Body | Useful distinction |
|---|---|---|
| Nano | 14 x 14mm | Connector or solder-pad option; bracket can adapt to 19mm |
| Micro | 19 x 19mm | M8 lens; naked or full-case option |
| Mini | 22 x 22mm | 1.8mm or 2.5mm lens choices |
| Full-cased 19mm | 19 x 19mm | M12 1.7mm lens and wider published FOV |
Do not buy a replacement case or lens only from the words “Predator 5.” Measure the PCB or case and check whether the lens thread is M8 or M12. A lens that looks similar may not focus correctly or may hit the frame.
What the main specifications mean
The Predator 5 uses a Sony 1/3-inch CMOS sensor and sends a 1000TVL CVBS analog signal. Its 4:3 and 16:9 modes are switchable, and PAL or NTSC is also switchable. The camera includes Super WDR, noise reduction and several scene modes such as day, cloudy, night and LED.
The published power range for the common Predator 5 versions is 4.5V to 20V. This does not mean every battery can be connected directly without checking. A noisy battery rail may create lines in the picture, and a fully charged pack can be higher than its nominal label.
How to wire the Foxeer Predator 5
Most installations use three essential camera connections. Wire colour is helpful, but the labels on the PCB and flight controller are the final reference.
- Positive: connect to a clean regulated output inside the camera range.
- Ground: connect to a stable common ground near the video path.
- Video: connect to the FC CAM input or directly to the VTX for testing.
- Menu control: attach the programming board only when adjusting settings.
Wiring through the flight controller
Use the flight-controller video path when you need Betaflight OSD. Connect the camera video output to the pad marked CAM, VIN or VIDEO IN. Connect the flight-controller output marked VTX, VOUT or VIDEO OUT to the transmitter video input.
Camera ground and VTX ground should share a stable electrical reference. A weak ground can produce rolling, colour loss or an image that changes when the motors start.
Direct camera-to-VTX test
For diagnosis, connect the camera video output directly to the VTX video input. If the image returns, the camera and VTX are working and the fault is likely in the flight-controller video path, OSD chip or solder joints.
Configure aspect ratio, video format and scene mode
Start with the camera and goggles set to the same aspect ratio. A 4:3 image shown on a forced 16:9 display looks stretched. A 16:9 image shown on 4:3 goggles may look compressed or cropped.
PAL and NTSC also affect the OSD canvas and receiver behaviour. When the format is wrong, the picture may roll, lose colour or place OSD elements outside the visible area. Change one setting at a time and save before removing power.
For normal daylight flying, leave Super WDR enabled and use the day or cloudy mode. The LED mode is useful around artificial lighting where normal exposure can produce flicker or blown highlights. Night mode can brighten shadows, but it also increases visible noise.
First power-on checklist
- Remove the propellers and attach the VTX antenna.
- Check positive and ground with a multimeter.
- Power through a smoke stopper or current-limited supply.
- Confirm a stable camera image before arming.
- Test OSD, aspect ratio and video format.
- Run the motors briefly and watch for electrical noise.
Do not leave the VTX powered without an antenna. High-power transmitters can heat quickly and may damage their RF output stage when the antenna is missing or damaged.
Common Predator 5 problems
| Symptom | Likely area | First test |
|---|---|---|
| OSD visible, black background | Camera power or CAM input | Measure camera voltage and bypass the FC |
| Full static | VTX or receiver path | Check antenna, pit mode and exact channel |
| Rolling picture | Format or ground | Match PAL/NTSC and inspect ground |
| Lines under throttle | Electrical noise | Use regulated power and check capacitor |
| Stretched image | Aspect mismatch | Match 4:3 or 16:9 |
Black background with Betaflight OSD visible
This symptom means the VTX, receiver and flight-controller output are already working. Check camera voltage at the connector, camera ground continuity and the video wire at the CAM input. Also inspect the connector pin order because similar camera plugs can use a different arrangement.
Static with no OSD
Static normally points to the transmitter or receiver path. Check VTX power, pit mode, antenna, band and channel. Manually select the exact channel rather than depending only on auto-scan.
Horizontal lines when throttle increases
Motor and ESC noise can enter the camera supply. Use a regulated camera output, keep the video wire away from motor phase wires and confirm the main low-ESR capacitor is healthy. Twisting video and ground together can also reduce interference.
Image is soft or looks smeared
Clean the lens and check focus. Loosen the retaining ring only enough to turn the lens, then view the live image while making very small adjustments. Lock the ring again without moving the focus point.
Conclusion
The Foxeer Predator 5 is straightforward to install once the correct body size and lens type are confirmed. Use clean power, match the aspect ratio and video format to the goggles, and route the analog signal through the flight controller only when OSD is needed.
Use the screen symptom to isolate faults. OSD on a black background usually points to the camera side, while full static usually points to the VTX, antenna, channel or receiver.
Frequently Asked Questions
Does the Foxeer Predator 5 need a driver?
No. It is an analog CVBS FPV camera and starts producing video after it receives the correct power and wiring.
Can the Predator 5 run from battery voltage?
Only when the exact camera version and the battery’s maximum fully charged voltage are within the published input range. Regulated power is usually cleaner.
Why can I see Betaflight OSD but no camera image?
The transmitter path is working, but the camera is not reaching the flight-controller input. Check camera power, ground, connector order and the CAM pad.
Can I switch between 4:3 and 16:9?
Common Predator 5 versions support switchable 4:3 and 16:9 modes through the camera menu.
What is the difference between Nano, Micro and Mini?
The main difference is the body size and mounting format. Lens type and weight can also differ.
Sources
Ryan tests consumer electronics for a living and documents the setup quirks manufacturers rarely mention, over at softwaredriverdownload.com.