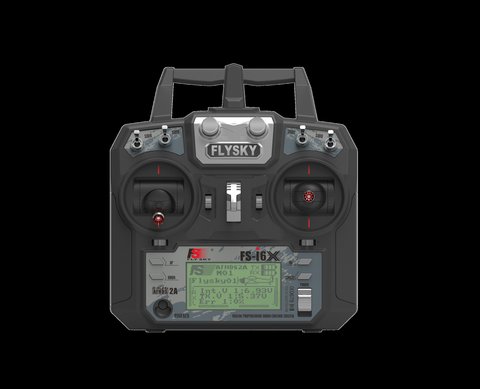
The FS-i6 is one of the most modified transmitters in the hobby, mostly because it ships as a 6-channel radio out of the box but the hardware is capable of a lot more once you flash different firmware onto it. Here is how the firmware update process actually works, including both the official route and the community-developed options that unlock extra channels.
Key Specs
- Model: FS-i6 (stick-type transmitter)
- Stock channels: 6, expandable via firmware to 8 or 10 depending on version
- Protocol: AFHDS 2A
- Connection: trainer port plus USB data cable for updates
- Display: monochrome LCD
- Typical use: fixed-wing, multirotor, and helicopter models
Two Different Firmware Paths
Before downloading anything, it helps to understand there are two distinct firmware ecosystems for the FS-i6:
- Community/mod firmware – projects hosted on GitHub that unlock the i6 to 10 channels and add extra mixing options. This is the most popular route among FPV and multirotor pilots.
- Bug-fix firmware for i6X units – separate from the base i6, this targets a known bug in certain FS-i6X firmware revisions rather than adding channels.
Make sure you know which transmitter you actually have before flashing anything, since the i6 and i6X use different hardware revisions and firmware files are not interchangeable.
What You Need Before Starting
- The correct data cable that connects the transmitter’s trainer port to a USB port on your PC
- The firmware file matching your exact transmitter version
- A Windows PC, since most of the flashing tools are Windows-only utilities
- Fully charged batteries in the transmitter, since a power loss mid-flash can brick the unit
I put off updating my own FS-i6 for almost a year because the process looked intimidating from the outside. Once I actually sat down and followed the documented steps from the community firmware project, the whole thing took under fifteen minutes including the stick recalibration afterward. The scariest part was just committing to plug in the cable.
“Flashing the i6 to 10 channels turned my backup radio into a genuinely usable transmitter for small multirotor builds. Just make sure your battery is fresh before you start.” – Alicia Kwan, FPV builder and flight instructor
Step-by-Step Update Process
- Download the firmware update tool and firmware binary matching your transmitter revision
- Connect the FS-i6 to your PC using the trainer port to USB data cable
- Power on the transmitter while holding both sticks down and to one side to enter the factory menu
- Navigate to the firmware update option and confirm entering update mode
- Run the flashing tool on your PC and select the correct COM port
- Load the firmware file and start the flash, without disconnecting the cable or powering off
- Once complete, power cycle the transmitter and run stick calibration
- Rebind all receivers, since a firmware change typically resets binding data
Risks Worth Knowing Before You Flash
- Unofficial firmware is a community modification, and Flysky does not provide support if something goes wrong
- A power interruption mid-update can leave the transmitter unresponsive, sometimes requiring a hardware reflash to recover
- Some mod firmware versions change menu layout significantly, so expect a short relearning curve
- Warranty coverage is typically void once non-official firmware is installed
If you would rather stay on official ground, Flysky does publish standard firmware revisions for supported models through its official site, though the base FS-i6 has received far fewer official updates over the years compared to newer models like the i6X or the surface radios in the G-series.
Backing Up Before You Flash
Regardless of which firmware path you choose, take these precautions first:
- Note down every model’s trim, reverse, and end point values in case you need to rebuild them manually
- If your flashing tool supports reading the existing firmware, save a copy before overwriting it
- Test on a spare receiver first if you have one, rather than your primary model’s bound receiver
- Read through the full community documentation once before starting, rather than following steps out of order from memory
It is tempting to skip straight to flashing once you have the file downloaded, but the ten minutes spent reading through a full guide start to finish saves a lot of troubleshooting later if something does not go exactly as expected on the first attempt.
Frequently Asked Questions
Will flashing new firmware void my warranty?
Installing unofficial or modified firmware typically voids manufacturer support and warranty coverage, since Flysky considers it a non-standard modification.
Can I go back to stock firmware after flashing a mod version?
In most cases yes, as long as you keep a backup of the original firmware file before starting the update process.
Does firmware flashing add real extra channels or just software tricks?
Genuine channel expansion mods add real usable channels by unlocking hardware capability that was software-limited, not just a cosmetic display change.
What happens if the power cuts out mid-flash?
This is the main failure risk with this process. It can leave the transmitter unable to boot, and recovery usually requires a low-level reflash using a hardware programmer, which is well beyond a simple retry.
After the Update: Verifying Everything Works
Once the flash completes and you have recalibrated and rebound, run through a quick verification checklist before your next flight:
- Move every stick and switch through its full range while watching the transmitter’s channel monitor screen
- Confirm servo direction on each control surface matches expectations, since reverses sometimes reset after a firmware change
- Test failsafe by powering off the receiver briefly and confirming the model responds correctly
- Check that the low voltage alarm still triggers at the expected threshold
This last step matters more than it might seem. A rushed post-update check is how people end up discovering a reversed aileron channel mid-flight instead of on the ground where it is a five-second fix.
Conclusion
Updating firmware on the FS-i6 opens up real capability for a radio that is otherwise capped at 6 channels, but it is not a step to rush. Confirm your exact hardware revision, keep the battery topped up, and follow the documented steps in order rather than improvising partway through the flash.
Ryan writes about driver installs, firmware updates, and hardware tweaks across consumer electronics, and has flashed his fair share of RC transmitters and receivers along the way. He writes at softwaredriverdownload.com.