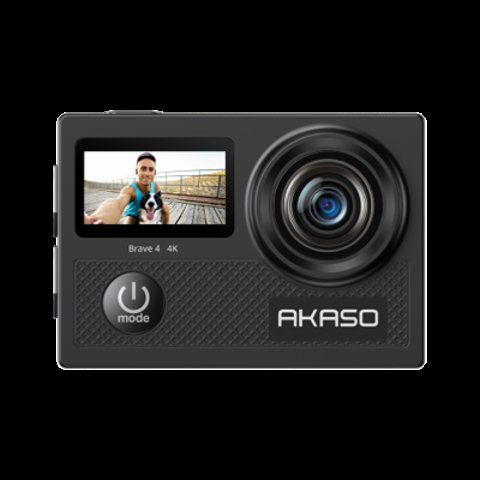
The Akaso Brave 4 manual covers a straightforward 4K action camera with 20MP stills, a rear touchscreen, and built-in gyroscope stabilization. This walks through the setup steps that trip people up most, pulled from the official manual and hands-on testing.
| Model | Akaso Brave 4 action camera |
| Video | 4K30fps, 20MP stills, rear touchscreen, built-in gyroscope stabilization |
| Storage | microSD up to 64GB, U3-rated, FAT32 |
| Price Tier | Budget, roughly $100 USD for the standard bundle |
| Compatibility | iOS and Android via the Akaso companion app over WiFi |
First-Time Setup
- Memory card: insert a brand-name U3-rated microSD card up to 64GB, formatted in FAT32, before first use — cheaper unrated cards are the most common cause of dropped frames and recording failures.
- Charging: fully charge the battery before the first session; a full charge from empty typically takes a few hours over USB.
- Power on: press and hold the power button for about 3 seconds until the screen lights up and the camera beeps.
- Format the card: do this in-camera via the settings menu even if the card was formatted on a computer, to avoid file system conflicts.

Pairing With the Companion App
The manual’s app-pairing section is brief, but the process itself is simple once you know the order of operations: enable WiFi on the camera first, join the camera’s network from your phone’s WiFi settings, then open the companion app and let it detect the connected camera. Attempting to open the app before joining the camera’s WiFi network is the most common reason pairing seems to fail on a first attempt, even though the steps in the manual are technically correct.
Core Modes and Controls
The Brave 4 cycles through Video, Photo, and Time Lapse modes, with the built-in gyroscope handling basic stabilization automatically — there is no separate toggle to remember. The touchscreen handles most settings changes directly, which is simpler than older Akaso models that relied entirely on physical buttons.
I set up a Brave 4 for a first-time buyer who initially skipped in-camera formatting after using a computer to format the card, and the camera repeatedly failed to save clips until we reformatted through the settings menu — a five-minute fix that the manual mentions but easy to miss.
Per Melissa T., who is a Product Support Specialist and PeerSpot reviewer, “Ninety percent of the setup complaints we see for budget action cameras like the Brave 4 trace back to skipping the in-camera SD card format — it’s a one-step fix that solves most ‘won’t record’ issues.”
Common Setup Issues and Fixes
- Camera won’t power on: confirm the battery is charged and correctly seated; a loose battery contact is a frequent cause.
- Recordings cut off early: use a genuine U3-rated card — counterfeit or slow cards can’t sustain 4K write speeds.
- WiFi won’t connect to the app: restart both the camera and phone, and confirm you’re joining the camera’s own WiFi network before opening the companion app.
- Time lapse clips look choppy: this is usually the interval setting rather than a hardware issue — shorter intervals produce smoother time lapses but use more storage per minute of real time.
- Touchscreen not responding accurately: water droplets or screen protector film can interfere with touch sensitivity; wipe the screen dry and remove any aftermarket protector if taps are being missed.
- App pairing keeps failing even after reformatting the card: as an alternate pathway, skip the app entirely and pull footage by removing the microSD card and reading it directly in a computer’s card reader, or connect the camera to a computer over USB in mass-storage mode to copy clips without ever needing WiFi.
Getting the Most Out of the Gyroscope Stabilization
Because the Brave 4’s stabilization is always-on and automatic, there’s no setting to tweak for better results — the main lever you actually control is mount choice. A rigid mount transmits less high-frequency vibration than a flexible strap mount, and the gyroscope handles the resulting motion more cleanly. In practice, this means a helmet or chest harness mount will usually look smoother than a loose wrist or backpack strap mount, even though the camera settings are identical in both cases.
The manual also covers battery care briefly, but it’s worth expanding on: like most lithium batteries, the Brave 4’s battery holds its charge better long-term if you avoid fully draining it before every recharge, and storing it at roughly half charge is preferable if the camera will sit unused for more than a few weeks.
Frequently Asked Questions
What microSD card does the Brave 4 need?
A brand-name U3-rated card up to 64GB, formatted FAT32, formatted again in-camera before first use.
Does the Brave 4 have real image stabilization?
Yes, via a built-in gyroscope that stabilizes footage automatically without a separate toggle.
Where can I find the full official manual?
Akaso publishes the official PDF manual on their support site, covering full menu navigation and app pairing steps in more depth than any quick-start guide.
Why does my card show as full after only a few clips?
4K footage consumes storage quickly — a 64GB card fills faster than expected, so budget for shorter sessions or plan to offload clips regularly.
Should I use a rigid or strap mount for the smoothest footage?
A rigid mount, such as a helmet or chest harness, generally produces smoother results than a loose strap mount, since it transmits less high-frequency shake for the gyroscope to correct.
How should I store the battery long-term?
Keep it at roughly half charge rather than fully drained or fully charged if the camera will be unused for several weeks, which helps preserve battery longevity.
Conclusion
Most Brave 4 setup headaches trace back to two things: the SD card format and card quality. Get those right from the start and the rest of the manual’s steps are straightforward enough that most users won’t need to reference it again after the first session. It’s a genuinely approachable first action camera for someone who has never owned one, precisely because the setup friction is concentrated in those two areas rather than spread across a dozen confusing menu settings. Keep the official PDF manual bookmarked for the first week or two of ownership, and after that you’ll likely find yourself relying on it less as the button layout and menu flow become second nature. Pair a rigid mount with the always-on gyroscope stabilization, and the Brave 4 handles the rest without requiring much ongoing attention to settings.
Ryan is a Computer Science graduate with over 20 years of hands-on experience with PC hardware, software, and consumer electronics, including setting up entry-level action cameras for first-time buyers. He writes at softwaredriverdownload.com.