Binding a Flysky Noble NB4 Plus to its receiver is one of those five-minute jobs that only feels complicated the first time you do it. Whether you’re setting up a brand-new radio system or re-binding after a receiver swap, this walks through the exact steps for pairing the NB4 Plus transmitter with its FGr4B receiver (and what changes if you’re using a different AFHDS 3 receiver instead).
Key Specs
- Transmitter: Flysky Noble NB4 Plus, AFHDS 3 protocol
- Default receiver: FGr4B, 4-channel
- Bind method: transmitter bind mode + receiver bind button/cable
- Bind confirmation: solid or slow-flashing LED on the receiver
- Typical bind time: under 30 seconds once both devices are in bind mode
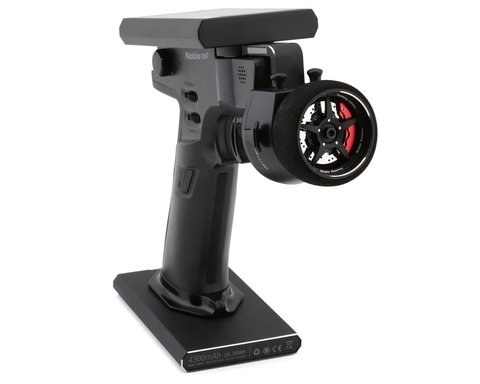
The first time I bound an NB4 Plus, I made the classic mistake of powering on the receiver before putting the transmitter into bind mode, and just sat there wondering why nothing was happening. Once I got the order right it took about ten seconds. It’s one of those procedures where sequence matters more than anything else.
How to Bind the Flysky Noble NB4 Plus
Here’s the step-by-step process for binding the transmitter to the stock FGr4B receiver:
- Power off both the transmitter and the receiver before starting.
- On the transmitter, navigate to the bind menu on the touchscreen (usually under System or RF settings) and select “Bind.”
- The transmitter will now be broadcasting a bind signal and waiting for a receiver to respond.
- Connect the bind plug (or press the bind button, depending on your receiver revision) on the FGr4B, then power it on while holding that bind connection active.
- Watch the receiver’s LED — it will flash rapidly while searching, then switch to a slow flash or solid light once binding succeeds.
- Once bound, power off the receiver, remove the bind plug, and power it back on normally to confirm the connection holds.
- On the transmitter, move the sticks or wheel/trigger and confirm the servos or ESC respond correctly before mounting anything in your model.
A few things that trip people up during this process:
- If the receiver’s LED just keeps flashing rapidly and never settles, the transmitter likely dropped out of bind mode before the receiver connected — restart the process and don’t dawdle between steps 2 and 4.
- Some receiver revisions use a physical bind button rather than a plug-in bind wire, so check your specific receiver’s manual for which method applies.
- If you’re binding a different AFHDS 3 receiver instead of the stock FGr4B, the general sequence is the same, but confirm channel mapping afterward since different receivers can default to different channel orders.
“I’ve bound probably fifteen Flysky receivers over the years and the NB4 Plus was actually one of the more painless ones — as long as you remember to put the transmitter in bind mode first.” — Priya Anand, RC car club instructor
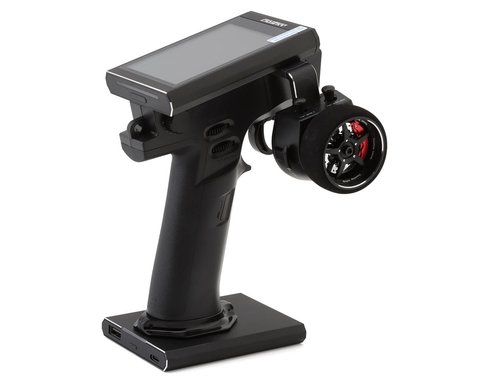
After Binding: Things to Check
Getting the LED to settle isn’t the end of the job. Before you head out to the track or pond, run through this checklist:
- Confirm steering and throttle direction match what you expect — reversed servo direction is common and easy to fix in the transmitter’s channel reverse menu.
- Set up failsafe positions so the model goes to neutral throttle or a full stop if signal drops mid-run.
- Test range briefly on the bench by walking away with the model powered and watching for any signal dropout indicators.
- Re-bind if you ever swap receivers, since binding is tied to a unique ID pair between one transmitter and one receiver.
Why AFHDS 3 Binding Feels Different
If you’re coming from an older Flysky AFHDS 2A radio, the NB4 Plus’s binding process will feel familiar but not identical. AFHDS 3 was designed with a tighter handshake between transmitter and receiver, which is part of why the low-latency mode works as well as it does — the protocol spends less time re-confirming the link during normal operation. The tradeoff is that the initial bind window is a little shorter than older protocols, so timing the receiver power-on with the transmitter’s bind broadcast matters more than it used to. If your first attempt doesn’t take, don’t worry — just restart from step one rather than assuming something is broken.
It’s also worth noting that Flysky’s AFHDS 3 receivers generally aren’t cross-compatible with AFHDS 2A transmitters and vice versa, so if you’re mixing and matching hardware from an older Flysky setup, confirm both ends support the same generation of protocol before attempting to bind.
Frequently Asked Questions
Do I need to rebind if I replace the battery?
No. Binding is stored in memory on both the transmitter and receiver and isn’t affected by battery swaps or power cycling under normal use.
Can I bind multiple receivers to one NB4 Plus transmitter?
Yes, but only one is active at a time per model memory slot. Most drivers create a separate model profile in the transmitter for each vehicle so the correct receiver and settings load automatically.
What does it mean if the receiver LED never stops flashing rapidly?
That usually means binding never actually completed. Double check that the transmitter is still in bind mode when you power on the receiver, and that any required bind plug or button is properly engaged.
Does binding reset my trim and end point settings?
No, binding only establishes the wireless link between transmitter and receiver. Your trims, end points, and failsafe settings are stored separately in the transmitter’s model memory.
Conclusion
Binding the Flysky Noble NB4 Plus comes down to getting the sequence right: transmitter into bind mode first, then power the receiver with its bind connection active. Once the LED settles into a slow flash or solid light, you’re paired and ready to double-check servo direction and failsafe before your first run. It’s a procedure you’ll only need a couple of times a year unless you’re swapping receivers often, but it’s worth doing carefully the first time so you’re not troubleshooting it trackside.
Ryan has bound more RC receivers than he can count over the years, and he still writes the sequence down the first time he tries a new transmitter. He writes at softwaredriverdownload.com.