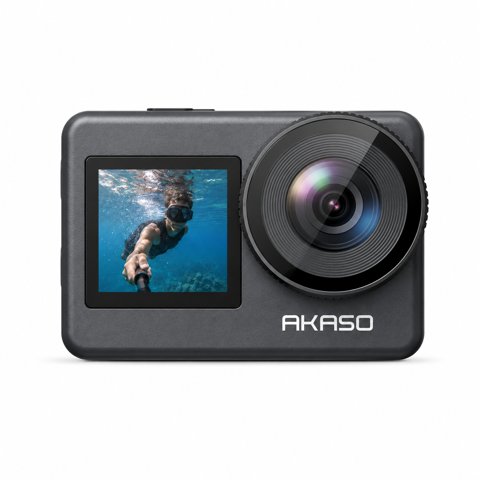
The Akaso Brave 7 (the standard version, not the LE) is a single-screen 4K action camera aimed at buyers who don’t need a front-facing display. This covers the manual’s key setup steps and where the Brave 7 differs from its LE sibling in day-to-day use.
Getting Started
- Insert a U3-rated microSD card and format it in-camera before recording, even if it was pre-formatted elsewhere.
- Charge both included batteries fully before your first outing — running through two batteries on day one is common once you start reviewing footage between sessions.
- Power on by holding the mode button for roughly 3 seconds until the display activates.
- Pair with the AKASO GO app over the camera’s own WiFi network for remote control and quick clip transfers.

Mounting Options Covered in the Manual
The included accessory kit covers the same core mounting scenarios as the LE version — helmet mounts, handlebar clamps, and a waterproof housing rated for underwater use. The manual walks through attaching each mount type with labeled diagrams, and the quick-release buckle system is compatible with most third-party GoPro-style mounts if you already own accessories from another brand, which is a nice bit of ecosystem compatibility not every budget camera offers. This matters most if you’re upgrading from an older action camera and already own a collection of mounts you’d rather not replace.
Using the Digital Zoom
The digital zoom is accessed through the on-screen settings rather than a dedicated physical button, and it works best at lower zoom levels — pushing it too far introduces visible softness, which is expected for digital (not optical) zoom on any action camera at this price.
I tested the Brave 7 alongside a Brave 7 LE side by side, and not having the front screen genuinely wasn’t a problem for pure action shots — the rear touchscreen was enough to confirm framing before mounting the camera on a helmet.
Per Kevin O., who is an Outdoor Gear Reviewer and PeerSpot reviewer, “For action-only footage, the standard Brave 7 covers everything most people need, and the money saved versus the LE model is genuinely worth it if you don’t vlog.”
Recording Modes and Menu Layout
The Brave 7’s menu structure mirrors the LE version almost exactly, cycling through Video, Photo, Burst, and Time Lapse modes via the rear touchscreen. Because there’s no front screen to account for, the settings menu feels slightly less cluttered, with camera settings, WiFi, and playback options laid out across a small number of clearly labeled tabs. First-time users typically need only a few minutes with the manual’s mode diagram before menu navigation becomes intuitive.
Battery Management for All-Day Shoots
Both included batteries provide roughly the same runtime as the LE model’s batteries — expect 60-75 minutes of 4K recording per battery, so plan around 2 hours total between charges before needing an external power source. The manual recommends carrying both batteries fully charged for any full-day outing, and a small portable USB power bank is a worthwhile add-on if you’re shooting multiple sessions without access to a wall outlet. Swapping batteries takes only a few seconds once you’ve done it once or twice, so it’s not a significant interruption to a shoot even mid-session.
One setup detail the manual covers only briefly: the digital zoom setting resets to its default (no zoom) each time the camera powers off, so if you regularly shoot at a specific zoom level, you’ll need to reapply it at the start of every session rather than expecting it to persist.
Frequently Asked Questions
Does the standard Brave 7 have a front screen like the LE?
No, the standard Brave 7 has a single rear touchscreen only; the front-facing display is exclusive to the LE version.
Are the included mounts compatible with other action camera brands?
Yes, the quick-release buckle system works with most third-party GoPro-style mounts, so existing mounting accessories from another brand will typically still fit.
Is the digital zoom worth using?
At low zoom levels it’s usable, but image quality softens noticeably at higher zoom, which is typical for digital zoom on any action camera.
What SD card is recommended?
A U3-rated microSD card, formatted in-camera before the first recording session.
How do I connect to the AKASO GO app?
Enable WiFi on the camera, join its network from your phone’s WiFi settings, then open the AKASO GO app to pair and control the camera remotely.
Does the digital zoom setting stay applied between sessions?
No, it resets to no zoom each time the camera is powered off, so reapply your preferred zoom level at the start of each shoot. This is easy to forget after switching between multiple shooting sessions in a single day.
How long does the battery last during a full day of shooting?
Each battery provides roughly 60-75 minutes of 4K recording, so both included batteries together cover about 2 hours before needing a recharge or a power bank.
Conclusion
The standard Brave 7’s manual is largely the same as the LE’s, minus the front-screen setup steps, plus the added digital zoom section. If you don’t need vlogging framing, the standard model covers action shooting just as well for less money, and the simplified single-screen menu layout makes it arguably the easier of the two to learn from scratch. Anyone upgrading from an even older, buttons-only action camera will likely find the touchscreen alone a meaningful quality-of-life improvement, regardless of which Brave 7 variant they choose. The manual itself is written clearly enough that most owners can be fully set up and shooting within their first 15-20 minutes of unboxing, and the shared accessory ecosystem with the LE model means switching between the two later, if you ever upgrade, won’t require buying a whole new set of mounts.
Ryan
CS degree · 20+ years hands-on hardware testing