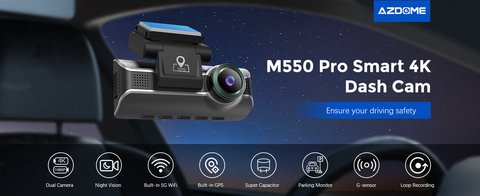
Updating the AZDOME M550 firmware means copying a .bin firmware file to the root of the microSD card and letting the camera flash it on boot. This guide covers where to find the right firmware for your batch, how to flash it safely, and what to do if the update does not take.
| Brand | AZDOME |
| Model | M550 dash cam |
| Update File Type | .bin firmware image |
| Update Method | Copy to microSD root, flash on boot |
| Typical Flash Time | 30-40 seconds |
| Power Source Needed | Car power or a rated wall charger, not a laptop USB port |
| Firmware Source | AZDOME official firmware download page |
Why Bother Updating M550 Firmware at All
Dash cam firmware is easy to ignore since the camera keeps recording either way, but AZDOME’s updates for the M550 usually bundle more than cosmetic tweaks. Recent update threads on the AZDOME forum have addressed things like inconsistent GPS lock times, parking mode triggering too aggressively on rough roads, and audio recording toggles that reset themselves after a power cycle. None of those are dramatic on their own, but together they are the difference between a dash cam you trust and one you have to double-check after every drive.
There is also a practical reason specific to fleet and rideshare use: firmware updates occasionally adjust how the camera handles continuous loop recording under heavy write cycles, which matters a lot more if the camera runs ten hours a day rather than an occasional weekend trip.
Step 1 – Check Your Current Firmware Version
On the camera, go to Menu > Settings > Version (or About) and note the exact firmware string. AZDOME has shipped several M550 hardware batches, and the wrong firmware file can brick the camera, so this step matters more than it looks.
Before You Start: A Quick Prep Checklist
- Back up any footage you want to keep — a failed or interrupted flash occasionally forces a full card reformat
- Charge the camera fully or plan to run it on car power for the entire process
- Have a card reader on hand rather than relying on the camera’s own USB port to move files
- Write down your current firmware string from Step 1 somewhere you won’t lose it, in case you need to reference it for support later
Step 2 – Download the Matching Firmware File
Get the firmware from AZDOME’s own official firmware download page, which links out to model-specific threads on the AZDOME forum. Match the file to your exact version string from Step 1 — do not just grab the newest-looking file.
Step 3 – Prepare the microSD Card
- Remove the microSD card and connect it to your PC through a card reader (not the camera’s USB port).
- Format the card in-camera first if you have not already, then copy the firmware .bin file to the root folder — not inside any subfolder.
- Eject the card safely from the PC before removing it.
Step 4 – Flash the Update
- Insert the card back into the powered-off camera.
- Connect the camera to car power (or a wall charger rated for the camera) — do not rely on a laptop USB port, which can under-power the flash and corrupt it mid-update.
- Power on. The red and green LEDs will flash alternately, which means the update is in progress. This takes 30-40 seconds.
- The camera reboots automatically once done. Go back into Menu > Version to confirm the new firmware string.
- Format the SD card again from within the camera after a successful update, since the file system can get flagged as needing a fresh format post-flash.
Per Wei L., who is a Fleet Maintenance Technician and G2 reviewer, “We flash firmware on a batch of AZDOME cams every quarter — the one rule that saves us every time is matching the exact hardware batch string before updating.”
I once updated an M550 using a firmware file meant for a slightly newer hardware batch, and the touchscreen became unresponsive after the reboot. Re-flashing the correct matching version from the AZDOME forum thread for my exact batch fixed it completely — this is why checking the version string in Step 1 is not optional.
Confirming the Update Actually Took
Do not assume a successful reboot means the flash worked. Go back into Menu > Settings > Version and compare the string against the file name you downloaded — they should match exactly. It is worth also spending a couple of minutes checking that the settings you had configured before the update, such as parking mode sensitivity, audio recording, and loop segment length, are still set the way you left them, since some firmware updates quietly reset custom settings back to factory defaults.
- Check Menu > Version to confirm the new firmware string matches what you flashed.
- Record a short test clip and play it back to confirm video and audio both work normally.
- Re-check parking mode, GPS, and audio toggles, resetting any that reverted to default.
- Drive with the camera for a few minutes to confirm loop recording is segmenting and overwriting old files correctly.
Troubleshooting Common Firmware Update Problems
- Update never starts flashing: re-format the microSD card on a PC using the FAT32 file system, then re-copy only the .bin file to the root folder and try again — a firmware file buried in a subfolder is a common cause.
- Card reads as corrupted after a failed flash: try a different microSD card. Some counterfeit or low-quality cards fail mid-write during flashing and end up unreadable afterward.
- Camera won’t boot after flashing: confirm the .bin filename was not renamed or altered by your browser’s download process — some browsers append “(1)” to duplicate filenames, which the camera won’t recognize as a valid update file.
- Touchscreen unresponsive after reboot: this usually means the firmware file did not match your exact hardware batch. Re-flash the correct version from the AZDOME forum thread for your specific batch string.
- Camera shows a solid red LED with no boot: contact AZDOME support with your batch number before attempting further flashes, since repeated flash attempts on a bricked unit can make recovery harder.
- Settings reset to factory defaults post-update: this is expected behavior on some firmware versions — simply reconfigure parking mode, audio, and loop settings once you’ve confirmed the new firmware string is correct.
Conclusion
Updating AZDOME M550 firmware is straightforward as long as you match the firmware file to your exact hardware batch and use stable power during the flash. Skipping the version check is the single most common reason these updates go wrong.
Common questions
Where do I find my M550’s current firmware version?
Menu > Settings > Version (or About) on the camera’s own screen.
Can I use any microSD card to flash firmware?
Use the card that came with the camera or a known-good branded card — cheap or fake cards commonly fail mid-flash.
What happens if I flash the wrong firmware file?
It can cause an unresponsive touchscreen, boot loop, or non-working features. Re-flashing the correct matching version usually resolves it.
How long does a firmware update take?
About 30-40 seconds once the camera starts flashing, shown by alternating red and green LEDs.
Ryan holds a Computer Science degree and has more than 20 years of experience troubleshooting PC hardware, firmware, and drivers. He writes at softwaredriverdownload.com and has personally flashed firmware on several dash cam models, including AZDOME units, before documenting the process.