The Realtek ALC888 driver is the audio codec software that makes onboard sound work correctly on motherboards using this chip, giving you speaker output, microphone input, and multi-channel surround sound instead of silence or a generic unrecognized device.
The ALC888 is one of the most common onboard audio codecs Realtek ever shipped, found on countless motherboards from Asus, Gigabyte, MSI, and others during the mid to late 2000s and even some boards after that. It is still around today in older office PCs and budget builds. I have reinstalled this exact driver more times than I can count on refurbished desktops, and the process is usually simple once you know which version actually matches your motherboard.
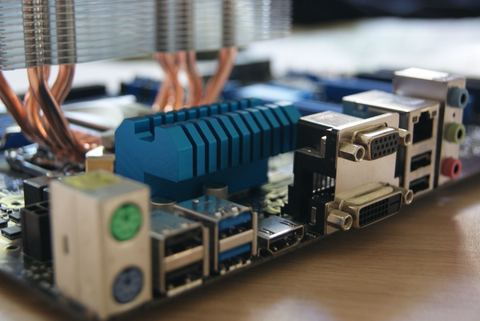
Applies To: Realtek ALC888 onboard audio codec
Author/Publisher: Realtek Semiconductor Corp.
Driver/Software Date: Latest High Definition Audio driver from Realtek
Version: Realtek HD Audio Driver R2.xx or later (universal package)
File Name: Setup(Realtek HD Audio Driver).exe
File Size: Roughly 300-450 MB
OS Compatibility: Windows 10 and Windows 11 (32-bit and 64-bit)
Where to Get the Right ALC888 Driver
Because the ALC888 is built into the motherboard rather than a separate card, the safest source for the driver is always your motherboard manufacturer’s support page, not Realtek’s general site. Motherboard makers customize the driver slightly for their specific board layout.
- Find your exact motherboard model, either printed on the board itself or through System Information (search “System Information” in the Start menu and check “BaseBoard Product”).
- Go to your manufacturer’s support site, such as ASUS Support or Gigabyte Support, and search that model number.
- Look under the Audio or Sound category in the driver downloads list and grab the newest one listed for Windows 10, since dedicated Windows 11 audio drivers are rare for this older chip.
- If your exact board is no longer listed by the manufacturer, the Realtek HD Audio Driver page offers a universal package that works on most ALC888-based boards.
Common Causes of No Sound
- Driver never installed after a fresh Windows install
- Windows Update replaced it with a generic HD Audio driver
- Onboard audio disabled in BIOS/UEFI settings
- Wrong output device selected as default in Windows Sound settings
- Front panel audio header wired incorrectly or not connected
- Muted channel inside Realtek Audio Console left unnoticed
Matching Fixes
- Install the manufacturer-specific ALC888 driver package
- Reinstall the driver and pause Windows Update audio changes
- Enter BIOS and re-enable onboard/HD audio controller
- Right-click the speaker icon, open Sound settings, set correct default
- Check the case front panel header against the motherboard manual
- Open Realtek Audio Console and check the mixer for muted channels
Step-by-Step Installation
- Close any open audio or video applications before installing.
- Right-click the downloaded setup file and choose “Run as administrator.”
- Follow the wizard through to completion, keeping the default options.
- Restart your PC when prompted, since Realtek’s HD Audio driver requires a reboot to load its kernel-level audio components.
- After restarting, look for the Realtek Audio Console (or Realtek HD Audio Manager on older builds) in your system tray or Start menu to verify the driver installed correctly.
Per Jason Lim, who is a Computer Repair Shop Owner in Kuala Lumpur, “Nine times out of ten when a customer brings in an old desktop with no sound, it is the Realtek driver that Windows quietly swapped out during an update, and reinstalling the correct one from the motherboard maker’s site fixes it in five minutes.”
Windows 10 vs Windows 11 Notes
The core driver behaves almost identically on both systems, but there are small differences to know about:
- Windows 11 renamed the control panel from “Realtek HD Audio Manager” to “Realtek Audio Console” on newer driver packages, and the interface layout changed even though the underlying settings are the same.
- Windows 11 is more aggressive about swapping in its own generic audio driver through Windows Update, so check Device Manager after major updates if your sound suddenly changes quality.
- Windows 10 systems that have not been updated in a long time may need a chipset driver update from the motherboard maker before the ALC888 driver installs cleanly.

Troubleshooting: Installer Fails or Sound Still Missing
If the driver installer errors out or sound is still missing after a successful install, work through these steps:
- Check BIOS settings first. Restart, enter BIOS/UEFI (commonly Del or F2 at startup), and confirm the onboard audio controller is set to Enabled rather than Disabled.
- Remove the old driver completely. Open Device Manager, expand Sound, video and game controllers, uninstall the Realtek entry with “Delete the driver software for this device” checked, then restart before reinstalling.
- Run the installer in compatibility mode if it refuses to start, by right-clicking the file, choosing Properties, then the Compatibility tab, and selecting an older Windows version.
- Update your motherboard chipset driver from the manufacturer’s site before retrying the audio driver, since HD Audio depends on a working chipset driver underneath it.
- Scan for hardware changes in Device Manager (Action menu > Scan for hardware changes) after any BIOS changes to force Windows to redetect the audio controller.
Manual Install via Device Manager
When the graphical installer will not run at all, install directly from the extracted files instead.
- Download the driver package and extract it with 7-Zip or a similar tool rather than running the installer.
- Open Device Manager and locate the audio device, which may appear as “High Definition Audio Device” or with a warning icon under Other devices.
- Right-click it, choose “Update driver,” then “Browse my computer for drivers.”
- Select the extracted folder so Windows can find the matching .inf file, and let it install.
- Restart your computer once the process finishes.
Fixing Common Issues After Install
- Microphone not detected: Right-click the speaker icon, open Sound settings, and check that the correct recording device is enabled and set as default under the Input section.
- Only two speakers work in a 5.1 setup: Open Realtek Audio Console, go to speaker configuration, and manually select 5.1 Speakers, then run the speaker test to confirm each channel.
- Front panel jacks do not work: In Realtek Audio Console, enable “Front Panel Jack Detection” under the connector settings, and double check the case’s front audio header is wired to HD Audio, not the older AC97 mode.
- Sound cuts out randomly: Open Device Manager, find the audio device properties, go to Power Management, and uncheck “Allow the computer to turn off this device to save power.” You can also check How-To Geek’s audio troubleshooting guides for more general Windows sound fixes.

Frequently Asked Questions
Should I download the driver from Realtek or my motherboard maker?
Always try your motherboard manufacturer’s site first, since they customize the driver for the board’s exact layout and included features. Only fall back to Realtek’s generic package if your board is too old to appear in the manufacturer’s current driver list.
Why did my sound stop working after a Windows Update?
Windows Update sometimes silently replaces the vendor-specific ALC888 driver with a generic Microsoft one, which lacks features like surround sound configuration. Reinstalling the manufacturer’s driver package usually restores full functionality.
Does the ALC888 support Windows 11 officially?
There is no dedicated Windows 11 driver since the chip predates it, but the Windows 10 driver installs and works normally on Windows 11 for the vast majority of users.
My speakers work but the microphone does not. What should I check first?
Start with Windows Sound settings to confirm the microphone is not muted or disabled, then check Realtek Audio Console’s input levels, and finally confirm the microphone is physically plugged into the pink/red input jack rather than a line-out port.
Can I get true 5.1 or 7.1 surround from onboard ALC888 audio?
Yes, the ALC888 supports up to 8-channel audio output, but you need to configure the correct speaker count in Realtek Audio Console and connect your speakers to the matching color-coded jacks on the motherboard’s rear panel.
Conclusion
The Realtek ALC888 remains solid onboard audio once its driver is set up correctly, and most sound problems trace back to either a missing driver or Windows Update quietly replacing it. Grab the driver from your motherboard maker’s site when possible, install it as administrator, and use the manual Device Manager method if the installer refuses to cooperate. A few minutes of setup is usually all it takes to get full sound back.
Written by Ryan, a Malaysia-based PC technician with a Computer Science background and over 20 years of hands-on experience diagnosing hardware and driver problems. More guides like this are available at softwaredriverdownload.com.