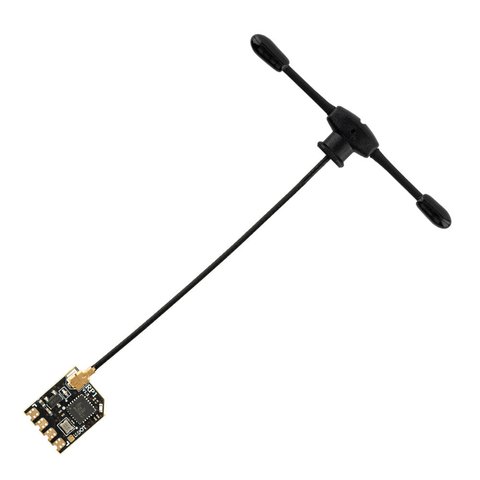
The RadioMaster RP1 is a nano-sized ExpressLRS receiver, not a full radio, and it is one of the most common questions I get from readers just starting to build their first ELRS setup. At a glance it looks like nothing more than a tiny circuit board with an antenna, but that small footprint hides a genuinely capable 2.4GHz receiver that has become a go-to choice for whoops, micro quads, and lightweight fixed wings. I have soldered several of these into builds over the past couple of years, and here is what actually matters about it.
| Spec | Detail |
|---|---|
| Model | RadioMaster RP1 |
| MCU / RF chip | ESP8285 / SX1281 (Semtech) |
| Dimensions | 13mm x 11mm x 3mm, 2.2g with antenna |
| Frequency | 2.4GHz to 2.48GHz |
| Refresh rate | 500Hz standard / F1000Hz full-rate, min 25Hz |
| Firmware | ExpressLRS V3 preinstalled |
| Price tier | Roughly $20–$25 USD |
Key Specs
- MCU: ESP8285, RF chip: SX1281 (Semtech)
- Dimensions: 13mm x 11mm x 3mm, weight 2.2g including antenna
- Frequency range: 2.4GHz to 2.48GHz (2.404-2.479GHz band)
- Maximum refresh rate: 500Hz standard / F1000Hz full-rate mode; minimum 25Hz
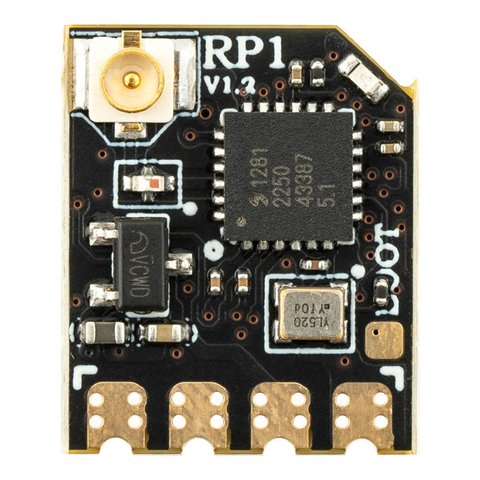
- Built-in TCXO for stable signal reception in varying temperatures
- Built-in Wi-Fi for firmware updates and configuration via WebUI
- ExpressLRS firmware V3 preinstalled, UFL antenna socket for a 65mm 2.4GHz T antenna
- Price tier: Budget, roughly $20–$25 USD
- Compatibility: Any 2.4GHz ExpressLRS transmitter module on reasonably current firmware — RadioMaster, BETAFPV, HappyModel, and others
What the RP1 Actually Is
To be clear from the start: the RP1 is a receiver, meant to go inside your aircraft, not a transmitter you hold in your hands. It receives control signals from a compatible ELRS transmitter (like a RadioMaster Pocket, Boxer, or GX12) and passes them to your flight controller. Its nano size and 2.2g weight make it ideal for builds where every gram matters, such as tiny whoops or ultralight fixed-wing planes, where a larger receiver would eat into your weight budget unnecessarily.
- The improved PCB design on the current version helps with heat dissipation compared to earlier nano receivers.
- The UFL antenna socket lets you swap in a longer or higher-gain antenna if your build needs more range than the stock T antenna provides.
- An onboard LED indicator gives a quick visual status check without needing to plug into a computer.
Setting Up and Binding the RP1
- Solder the RP1 to your flight controller’s UART pins according to your build’s wiring diagram, matching TX/RX and power connections carefully.
- Attach the 65mm T antenna to the UFL connector, making sure it seats fully before flying.
- Power on your ELRS-compatible transmitter and put it into bind mode from the Internal RF menu.
- Power the RP1 and hold down its bind button (or use the WebUI bind option) until the LED confirms a successful pairing.
- Once bound, verify signal and telemetry in your flight controller’s configurator before your first flight.
The RP1’s built-in Wi-Fi feature makes updating its firmware simpler than older ELRS receivers that required a USB-to-serial adapter. Once powered, it can broadcast its own Wi-Fi access point, letting you connect from a phone or laptop and flash new firmware directly through the ExpressLRS WebUI.
Refresh Rate and Range Tradeoffs
Like most ELRS receivers, the RP1 lets you choose between different packet rates depending on your priorities. Running at F1000Hz gives the tightest possible control response, ideal for competitive racing or technical freestyle where every millisecond of latency matters, but it slightly reduces maximum range compared to the standard 500Hz mode. Dropping to a lower rate like 150Hz or 50Hz extends range considerably, which matters more for long-range cruising or fixed-wing flights where you are pushing distance rather than chasing the tightest stick response.
- Racing and freestyle: favor higher refresh rates for the most responsive control feel.
- Long-range cruising: favor lower refresh rates to maximize usable range on the same hardware.
- ExpressLRS’s adaptive rate features can also switch automatically based on signal quality, if enabled in your configuration.
My Experience Building With the RP1
I first used an RP1 on a lightweight 3-inch build where I was chasing every possible gram of weight savings, and soldering it in took about ten minutes once I had the wiring diagram in front of me. The part that impressed me most was the Wi-Fi firmware update feature; on older nano receivers I owned, updating meant digging out a USB-to-UART adapter and fiddling with driver installs, but with the RP1 I just connected to its access point from my laptop and flashed the new firmware directly through the browser. The one thing I would tell a first-time builder is to double-check antenna orientation relative to your frame’s carbon fiber arms, since carbon can shield signal if the antenna sits too close to it.
Common Setup Issues
- Receiver won’t bind: confirm both the transmitter and RP1 are on matching ELRS firmware major versions, and double-check the binding phrase if you have set a custom one.
- Weak or inconsistent range: check antenna placement, avoiding routing it directly against carbon fiber frame arms which can shield the signal.
- No telemetry showing in the flight controller: verify the UART wiring matches your specific flight controller’s receiver protocol setting (usually CRSF for ELRS).
- Overheating during extended flights: the current PCB revision improves heat dissipation, but very hot ambient conditions combined with high transmit power can still warm the module noticeably; this is generally within normal limits.
- Wi-Fi bind or update won’t connect: the manual fallback is the physical bind button — hold it while powering the RP1 to force bind mode without relying on the WebUI, and if firmware flashing over Wi-Fi keeps failing, a USB-to-UART adapter and the ExpressLRS Configurator still work as a wired backup.
Frequently Asked Questions
Is the RP1 compatible with any ELRS transmitter?
Yes, as long as your transmitter runs a 2.4GHz ExpressLRS module and reasonably current firmware, the RP1 will bind and communicate normally regardless of which RadioMaster (or other brand) transmitter you use.
Can the RP1 be used on a fixed-wing plane, not just quads?
Yes, its light weight and long-range firmware settings make it a common choice for lightweight fixed-wing builds where range and low weight both matter.
Does the RP1 support telemetry back to the transmitter?
Yes, ExpressLRS receivers including the RP1 send telemetry data such as signal strength and battery voltage back to the transmitter’s display over the same link.
How do I know if I need the standard UFL antenna or an upgraded one?
The stock 65mm T antenna is fine for typical park flying and freestyle ranges. If you are pushing long-range flights, a higher-gain or extended antenna connected to the same UFL socket can meaningfully improve range.
Conclusion
The RadioMaster RP1 is a small but capable ExpressLRS nano receiver, not a radio, and it earns its popularity through a genuinely useful combination of low weight, solid range, and Wi-Fi-based firmware updates that remove a lot of the hassle older nano receivers required. Whether you are building a featherweight whoop or a long-range fixed wing, it is worth checking the RP1 against your specific weight and range needs before committing. Full specs and current pricing are available on the official RadioMaster RP1 product page.
Ryan builds and flies FPV quads as a hobby alongside his software and hardware writing. He writes at softwaredriverdownload.com.