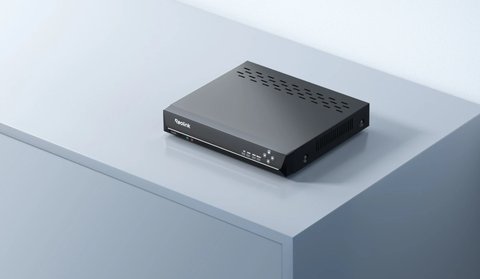
Keeping a Reolink NVR’s firmware current matters more than it does for a single camera, since the NVR is the central point managing every connected channel, storage, and remote access for the whole system. This is a complete walkthrough covering checking your version, updating safely, handling multi-camera systems, and recovering from a failed update.
| Item | Detail |
|---|---|
| Where to check version | Device Settings > Device Information |
| App-based update | Reolink mobile app, Check for Firmware Updates |
| Manual update tool | Reolink Client desktop software |
| Firmware source | Reolink Download Center, matched to model + hardware version |
| Typical update time | Several minutes; can run longer than camera updates |
| Auto-upgrade option | Available in Device Information menu |
Checking Your Current Firmware Version
- Open the Reolink app, select the NVR, and go to Device Settings, then Device Information
- Note the current firmware version and hardware version listed there
- Compare it against the latest release for your exact NVR model on Reolink’s official Download Center
Hardware version matters just as much as the model name here — Reolink often ships multiple hardware revisions of the same NVR model over its production life, and firmware files are matched to a specific hardware version, not just the model number.
Updating Through the App
- In Device Information, tap Check for Firmware Updates
- If an update is found, download and install it directly through the app
- Keep the app open and the NVR powered and connected throughout the process
- Wait for the NVR to fully reboot before making any other configuration changes
Updating Manually via Reolink Client
If the app doesn’t detect an available update, or you need a specific version, Reolink’s Download Center lists firmware files by exact model and hardware version, installed manually through the Reolink Client desktop software.
- Download the firmware file matching your NVR’s exact model and hardware version
- Open Reolink Client on a computer connected to the same local network as the NVR
- Select the NVR, choose the manual firmware upload option, and select the downloaded file
- Do not interrupt power or network connection once the upload has started

Manual updates carry more risk than app-based updates specifically because it’s easier to select the wrong firmware file for your hardware revision by mistake — double-check the hardware version match before uploading anything manually, since installing firmware built for the wrong revision can cause serious problems.
Firmware Updates and Connected Cameras
- Updating the NVR’s firmware doesn’t automatically update the firmware on connected PoE cameras; those typically need separate updates
- Check each camera channel’s own device information after an NVR update to see if camera-specific updates are also available
- Some NVR firmware updates specifically improve compatibility or stability with certain camera models, worth checking release notes for
What to Do If an Update Fails
- If the NVR seems unresponsive for more than 15 to 20 minutes after starting an update, avoid power-cycling immediately; NVR updates can legitimately take longer than camera updates due to more onboard storage and services
- If it truly appears stuck well beyond that window, a power cycle followed by re-attempting the same firmware version is the next step
- If repeated updates fail, contact Reolink support with your exact model, hardware version, and current firmware version before attempting further manual interventions
- Avoid downgrading firmware unless specifically advised to by Reolink support, since some updates include one-way database or storage format changes

Preparing Your NVR Before You Update
A little preparation avoids most update headaches. Before starting any firmware update, whether through the app or manually via Reolink Client, run through this short checklist:
- Confirm the NVR is on a stable power source, ideally not on a circuit prone to interruptions during the update window
- Make sure the network connection, wired is strongly preferred over Wi-Fi for an NVR, is stable for the duration of the update
- Note your current firmware version and hardware revision somewhere before you start, in case you need to reference it while troubleshooting
- Avoid starting an update right before you need reliable remote monitoring, in case the process takes longer than expected
- If you manage multiple NVRs, update them one at a time rather than simultaneously to make it easier to isolate any issue that comes up
Setting Up Auto-Upgrade
Once you’ve confirmed the NVR updates cleanly, enabling auto-upgrade in the same Device Information menu means future updates install automatically without needing to check manually. This is the easiest way to stay current without making firmware maintenance a recurring task.
For firmware downloads and release notes, see Reolink’s official Download Center, and the Reolink support center for troubleshooting a specific update issue.
Frequently Asked Questions
Will a firmware update erase recorded footage?
No, firmware updates affect the NVR’s software; footage stored on its hard drive stays intact through a normal update.
How often should I check for NVR firmware updates?
Enabling auto-upgrade removes the need to check manually; otherwise, checking every couple of months is a reasonable habit.
Can I update the NVR remotely, away from home?
Yes, through the app’s remote connection, though updating over a stable local connection is generally safer if you have the option.
Does updating the NVR log me out of the app?
You may need to reconnect after the NVR reboots, but your account and camera configuration remain unchanged.
Is it safe to update multiple NVRs at once on the same network?
Yes, but updating them one at a time reduces network load and makes it easier to spot which device had an issue if something goes wrong.
Keeping Firmware Updates From Becoming a Bigger Job Than They Need To Be
One habit that saves a lot of frustration is checking the release notes before starting an NVR firmware update rather than after. Reolink usually lists whether a given release touches storage formatting, ONVIF behavior, or app pairing — details that matter more on an NVR than on a single standalone camera, since a formatting change can affect every connected channel at once. If a release note mentions anything about database or storage structure changes, it is worth exporting your current recording schedule and channel names first, purely as a reference in case you need to rebuild the configuration afterward.
It also helps to update during a low-usage window rather than in the middle of active recording or live viewing, especially on systems running eight or more channels. The NVR briefly pauses recording during the firmware write, and while the gap is usually short, doing it while everyone is home and multiple cameras are being viewed live increases the odds of a dropped connection needing a manual reconnect afterward. Scheduling the update for early morning or a quiet stretch of the day keeps that disruption to a minimum and gives you time to confirm every channel is back online before it matters.
Conclusion
Keeping NVR firmware current is more consequential than camera firmware alone, since it affects the whole system’s storage, remote access, and multi-camera stability. Enable auto-upgrade once you’ve confirmed a clean update, double-check hardware version matches for any manual update, and be patient rather than power-cycling during a longer-than-expected update.
Ryan is a Computer Science graduate with a long history of hands-on PC and network troubleshooting, writing for softwaredriverdownload.com.