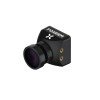
The Foxeer Razer Mini is a 22mm analog FPV camera, but its available settings depend on the exact version. The current V3 listing is 4:3 and PAL, while older standard Razer listings may offer optional 4:3 or 16:9 and switchable PAL or NTSC.
I compared a Razer Mini V3 against an older V2 for a reader upgrading their build and the newer version’s improved low light performance was the clearest difference during a dusk test flight.
This version difference matters because an older guide may tell you to change a menu option that does not exist on your camera. Check the label, package and seller description before troubleshooting.
Razer Mini version differences
| Version | Published format | Important note |
|---|---|---|
| Razer Mini V3 | 4:3 PAL | Current listing; no flight OSD |
| Razer Mini V2 | 4:3 PAL | Older listing; no flight OSD |
| Standard Razer Mini | 4:3 or 16:9; PAL/NTSC switchable | Different lens and option combinations |
All three listed versions use a Sony 1/3-inch CMOS sensor and 1200TVL CVBS output. The V3 and V2 official listings show a 22 x 22mm body, 5V to 25V input and no flight OSD.
The standard older Razer page lists optional lens and aspect-ratio choices with PAL or NTSC switching. Because the product name is reused, verify the SKU or version before buying a replacement.
How to wire the Razer Mini
The camera normally has positive, ground and video. Connect positive to a regulated camera supply, ground to a nearby ground pad and video to the flight controller camera input.
- Check the exact Razer Mini version and pinout.
- Connect positive to a regulated camera supply.
- Connect ground to common ground.
- Connect video to the FC CAM input.
- Connect FC VOUT to the VTX input.
- Power on with props removed and confirm PAL display.
The Razer Mini supports a broad input range on its official listings, but regulated power is still preferred. Raw battery voltage carries more switching noise and can make the image worse even when it remains inside the voltage limit.
Set the goggles and flight controller correctly
For V3 or V2, start with 4:3 PAL. Set the receiver or goggles to the correct display mode and make sure Betaflight OSD uses the same format. A mismatch can move OSD elements or create vertical position problems.
If you have the standard older Razer, open the camera menu and confirm the aspect ratio and video format. Save the setting before removing power.
The camera does not include flight OSD on the current official V3 and V2 pages. Battery voltage and flight information must come from the flight controller OSD.
Image setup for racing and freestyle
Leave automatic shutter and white balance enabled for the first flights. The 90dB WDR setting helps when the ground is dark and the sky is bright. High sharpness may make gates look clear, but it can also emphasize analog noise.
For indoor flying, check for flicker under LED lights. A fixed PAL camera may interact with some lighting. Move the camera away from the light source or test another location before treating flicker as a hardware fault.
Installation checks
- Fit the 22mm body without bending the case.
- Set camera tilt while viewing the goggles.
- Keep the cable away from motor wires.
- Confirm no frame edge blocks the lens.
- Test the picture before fully tightening screws.
Do not tighten the side screws until the camera case bends. A distorted case can place pressure on the PCB or change the tilt during a crash.
Common Razer Mini problems
| Problem | Likely cause | Fix |
|---|---|---|
| Black with OSD | Camera or CAM input | Measure power and bypass FC |
| Rolling | Wrong format or weak ground | Use PAL for V3/V2 and inspect ground |
| Stretched | Goggle aspect mismatch | Use 4:3 for V3/V2 |
| No OSD | FC output or configuration | Check VOUT and Betaflight |
| Throttle lines | Power noise | Use regulated supply and filtering |
Black image with OSD still visible
Check the camera power wire and CAM input. The OSD proves that the flight controller output and transmitter path are active. Test the camera video wire directly on the VTX input to isolate the flight controller.
Rolling image or wrong colours
Use PAL for V3 and V2 unless the exact menu says otherwise. Also check the shared ground. A video format mismatch and poor ground can look similar.
Image looks stretched
Set the goggles to 4:3 for V3 and V2. A 4:3 image forced into a 16:9 display makes gates and objects look wider than they are.
Lines appear under throttle
Move the camera to a regulated output, inspect the battery capacitor and twist video with ground. Keep camera wiring away from ESC motor pads and high-current battery leads.
Separate a camera fault from a transmitter fault
Do not replace the Razer Mini only because the goggles show no picture. Start by checking what the screen actually displays. Full static means the receiver is not locked to a useful VTX signal. A clean black background with Betaflight OSD means the transmitter path is active, but camera video is missing before the OSD chip.
Measure voltage at the camera connector while the camera is plugged in. An unloaded pad may show the correct voltage but collapse when the camera draws current. Next, move the camera video wire directly to the VTX input. If the picture appears, inspect the flight-controller CAM pad, OSD chip and VOUT path.
When there is still no picture on a direct connection, test the camera on a known working VTX or test a known working camera on the same transmitter. Change only one part at a time. This method prevents a working camera from being replaced when the real fault is a loose antenna, pit mode or an incorrect channel.
Conclusion
The Foxeer Razer Mini is simple to wire, but the reused product name can cause setup confusion. Identify V3, V2 or the standard older model before changing aspect-ratio or format settings.
For V3 and V2, begin with 4:3 PAL, regulated power and a direct video-path test when the screen is black.
Frequently Asked Questions
Is the Foxeer Razer Mini V3 switchable to NTSC?
The current official V3 listing specifies PAL and 4:3. Do not assume NTSC switching unless your exact camera menu shows it.
What voltage does the Razer Mini use?
The official V3 and V2 listings specify 5V to 25V input.
Does the Razer Mini have a built-in flight OSD?
The current V3 and V2 listings state that flight OSD is not included.
Why does my Razer Mini image look stretched?
The goggles may be using 16:9 while the camera is producing a 4:3 image.
Can I connect the video wire directly to the VTX?
Yes, for a diagnostic test or a build that does not need flight-controller OSD.
Sources
Ryan writes hands-on guides at softwaredriverdownload.com after years of hobbyist FPV building, streaming setup, and general gadget troubleshooting.