Setting up an Imou CCTV system means either pairing a standalone WiFi camera through the Imou Life app, or connecting wired cameras to an Imou NVR (network video recorder) and binding the whole system to the app afterward. The two paths are different enough that many people get confused about which steps apply to them, so this guide covers both.
I’m Ryan, and I’ve helped set up both types of Imou systems — a single WiFi camera for a friend’s home office, and a full 4-channel NVR kit for a small shop. The wired NVR setup takes more planning because of cabling, but it’s actually more reliable once running, since it doesn’t depend on WiFi signal strength. Below I’ll break down both approaches step by step.
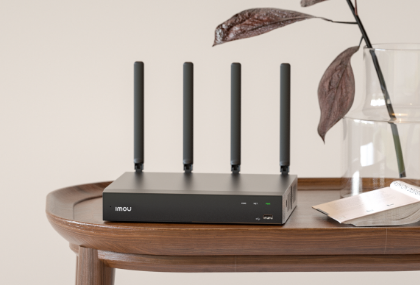
Two Types of Imou CCTV Setup
Before starting, figure out which kit you have, since the setup steps differ:
- Standalone WiFi cameras — pair directly to your home WiFi through the Imou Life app, no NVR needed
- NVR-based wired kit — cameras connect by cable (often PoE, Power over Ethernet) to a central NVR box, which then connects to the app
- Mixed setup — some Imou NVRs also support adding WiFi cameras alongside wired ones
1. Setting Up a Standalone WiFi Camera
1.1 Power and Prepare
Plug in the camera and wait for the status light to blink, which signals it’s ready for pairing. Make sure your phone is connected to your home’s 2.4GHz WiFi band, since most Imou WiFi cameras don’t support 5GHz.
1.2 Add the Device in the App
Open the Imou Life app, tap “+” to add a device, enter your WiFi password, and scan the QR code that appears on your phone using the camera’s lens. Wait for the confirmation beep, then give the camera a name based on its location.
1.3 Choose Storage
Decide between a microSD card (local, one-time cost) or a paid cloud storage plan (offsite backup, protected even if the camera is stolen). Many users start with an SD card and add cloud storage later once they know they’ll keep the system long-term.
2. Setting Up an NVR-Based Wired CCTV Kit
2.1 Physical Cabling
Connect each camera to the NVR using the supplied network cables, typically through PoE ports so a single cable carries both power and data. Connect the NVR to your router or switch using a separate network cable, then connect the NVR to a monitor or TV using HDMI if you want a local live view.
2.2 Power On in the Right Order
Finish all physical cabling first, then power on the cameras and the NVR together. According to Imou’s official quick start documentation, newly connected wired cameras will automatically register with the NVR once both are powered, so you usually don’t need to add them manually.
2.3 Initial NVR Configuration
On first boot, the NVR will prompt you through a local wizard (via the connected monitor) to set a device password, date and time, and network settings. Set a strong password here — this is one of the most important security steps in the whole setup, since a weak or default NVR password is a common target for attackers scanning the internet.
2.4 Bind the NVR to the Imou Life App
In the app, tap “+” to add a device, then choose to scan the Net Config QR Code shown on the NVR’s local interface or in its cloud service menu. Make sure Cloud Services is turned on within the NVR settings and that the NVR has an active internet connection, otherwise the app may fail to detect it.
3. Adding Cameras Manually via ONVIF
If a wired camera doesn’t auto-register, or if you’re connecting a camera from a different brand, you can add it manually using ONVIF, an open standard that lets IP cameras and recorders from different manufacturers talk to each other. On the NVR’s local menu, go to camera settings, choose “Add Manually,” select ONVIF as the protocol, then enter the camera’s IP address, port, username, and password. You can read more about the standard itself at ONVIF.org. Most Imou cameras have ONVIF enabled by default, so you rarely need to turn it on separately.
4. Storage Options for NVR Systems
- Internal hard drive — most NVRs have a bay for a surveillance-rated hard drive, giving days or weeks of continuous recording depending on capacity and camera count
- Cloud storage — an added layer that backs up key footage even if the NVR itself is damaged, stolen, or the drive fails
- Combined — many small businesses run both, using the hard drive for full continuous recording and cloud for critical clips only
If you’re installing the internal drive yourself, use a drive rated for 24/7 surveillance use rather than a regular desktop drive, since standard drives are not built for constant read-write cycles and tend to fail earlier in this kind of workload.
5. Network and Remote Access Setup
5.1 Viewing Footage Remotely
Once the NVR or camera is bound to your Imou Life account, you can view live and recorded footage from anywhere through the app, as long as the NVR has an internet connection. No manual router configuration such as port forwarding is required for basic remote viewing, since the app handles the connection through Imou’s cloud relay.
5.2 Don’t Expose the NVR Directly to the Internet
Avoid setting up direct port forwarding or placing the NVR in your router’s DMZ just to access it remotely. This exposes the login page to random scanning from the internet, and NVRs are a common target for automated attacks looking for weak or default passwords. The app’s built-in remote access is safer because it doesn’t require opening inbound ports on your router at all.
6. Firmware and Ongoing Maintenance
Check for firmware updates on both the cameras and the NVR periodically through the app or the NVR’s local menu. In my experience managing the shop’s NVR kit, firmware updates occasionally improved motion detection accuracy and fixed small app connection bugs, so it’s worth checking every couple of months rather than only when something breaks.
Per Marcus Wei, who is a Facilities Manager at Coastal Retail Group, “We moved three branches to Imou NVR kits, and the ONVIF support meant we could keep a couple of older cameras from our previous system instead of replacing everything at once. The app binding through the QR code was painless compared to the old web-based setup we used before.”
Frequently Asked Questions
Do I need an NVR if I only have one or two cameras?
No, standalone WiFi cameras work fine on their own through the Imou Life app without any NVR. An NVR becomes useful once you have several wired cameras or want a local hard drive for continuous recording.
Can I mix WiFi cameras and wired cameras in one Imou system?
Some Imou NVR models support adding WiFi cameras alongside wired ones, but not all do, so check your specific NVR model’s specifications before assuming this works.
What is ONVIF and why does it matter for CCTV setup?
ONVIF is an open industry standard that lets cameras and recorders from different manufacturers communicate with each other. It matters because it lets you add a non-Imou camera to an Imou NVR, or an Imou camera to another brand’s recorder, instead of being locked into one manufacturer.
Is it safe to access my NVR remotely over the internet?
Yes, as long as you use the Imou Life app’s built-in remote access rather than exposing the NVR directly through port forwarding. Also set a strong, unique password on the NVR itself, since that’s the main defense against unauthorized access.
How much storage do I need for continuous recording?
It depends on the number of cameras, resolution, and how many days of footage you want to keep. As a rough guide, more cameras and higher resolution settings will fill a hard drive faster, so check the NVR’s storage calculator in the app or manual before buying a drive.
Conclusion
Imou CCTV setup splits into two clear paths: pairing a standalone WiFi camera through the app in a few minutes, or cabling wired cameras into an NVR and binding the whole system with a QR code scan. Whichever path you take, set a strong NVR password, avoid exposing it directly to the internet, and keep firmware updated. Once configured, both setups are simple to manage day to day through the same Imou Life app.
Ryan is a Computer Science graduate with more than two decades of hands-on experience with PCs, software, and consumer electronics, including home and small-business security systems. He shares practical setup guides at softwaredriverdownload.com based on systems he has actually installed.