The Microsoft LifeCam VX-800 driver is the small piece of software that lets Windows recognize the webcam, show live video, and let apps like Skype or Teams use the microphone built into the camera.
If you just plugged in an old LifeCam VX-800 and Windows is not showing any picture, or the camera shows up in Device Manager with a yellow warning icon, you are in the right place. I have set up this exact webcam on three different laptops over the years for family members who wanted a cheap way to do video calls, so I know where people usually get stuck. Below I will walk you through downloading the correct driver, installing it the easy way, and fixing it manually if the automatic method fails.
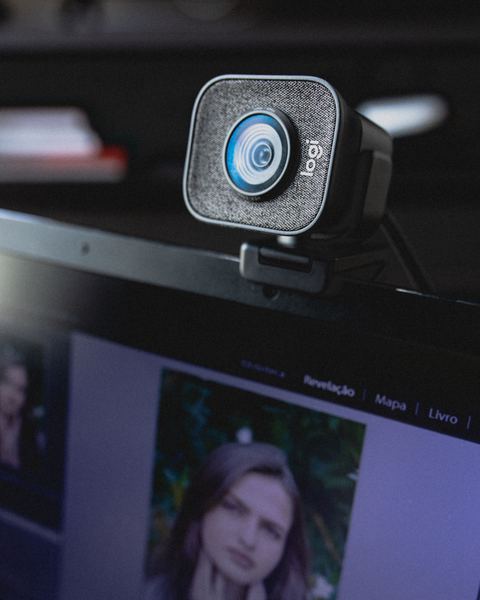
Applies To: Microsoft LifeCam VX-800 (models JSD-00001, JSD-00007)
Author/Publisher: Microsoft Corporation
Driver/Software Date: Latest available from Microsoft Download Center
Version: LifeCam software 3.x (varies by Windows build)
File Name: LifeCam-x64.exe / LifeCam-x86.exe
File Size: Roughly 40-60 MB
OS Compatibility: Windows 10, Windows 11 (basic UVC driver works out of the box; full LifeCam app adds controls)
Step 1: Download the Correct Driver
The LifeCam VX-800 is an older device, and Microsoft folded most of its webcam support into the generic Windows USB Video Class (UVC) driver. This means Windows 10 and Windows 11 usually detect the camera automatically the moment you plug it in, without asking for anything. But if you want the extra software with brightness, contrast, and effects controls, you still need the official LifeCam package.
- Go to the Microsoft LifeCam support page and search for VX-800, or use the Microsoft LifeCam software download page directly.
- Pick the version that matches your system: 32-bit or 64-bit. Most PCs made in the last ten years are 64-bit, but check under Settings > System > About if you are not sure.
- Save the installer somewhere easy to find, such as your Downloads folder or Desktop.
Step 2: Install the Driver (Numbered Steps)
Here is the straightforward path most people should follow first.
- Close any app that uses the camera. If Skype, Zoom, or your browser has a video call window open, close it before installing.
- Run the installer as Administrator. Right-click the downloaded file and choose “Run as administrator” so Windows does not block driver files partway through.
- Follow the setup wizard. Accept the license terms, choose the default install folder, and let it finish.
- Plug in the webcam if it was not already connected, and wait for Windows to finish the “Setting up device” notification in the bottom right corner.
- Restart your PC. This step gets skipped a lot, but it matters. Some driver files only load fully after a reboot.
- Test the camera by opening the Windows Camera app from the Start menu and checking that you see live video.
Per Daniel Wong, who is an IT Support Technician at a community college in Penang, “The trick with these old LifeCam units is always the same, install the software first before you plug the cable in, then Windows grabs the right driver automatically instead of falling back to a generic one.”

Windows 10 vs Windows 11 Differences
Both operating systems handle the VX-800 in mostly the same way, but there are a few small differences worth knowing:
- Windows 11 is stricter about camera privacy permissions. Even after the driver installs correctly, apps will show a black screen if camera access is turned off in Settings > Privacy & security > Camera.
- Windows 10 sometimes keeps an old, outdated driver cached from Windows Update, which can conflict with the official LifeCam installer. Uninstalling the old device first (covered below) usually fixes this.
- Both versions will run the webcam fine using the built-in generic UVC driver even if the full LifeCam app refuses to install, since the core video and audio streams do not depend on Microsoft’s extra software.
Step 3: Troubleshooting When the Installer Fails
Sometimes the installer just refuses to finish, or the camera still does not show video afterward. Here is what usually solves it, roughly in order of how often each one works:
- Run Windows Update first. Go to Settings > Windows Update > Check for updates, and install any pending updates. Windows sometimes needs a current build before older USB drivers will bind correctly.
- Uninstall the old device entry. Open Device Manager, expand Cameras (or Imaging devices), right-click the VX-800 entry, choose Uninstall device, and tick “Delete the driver software for this device” if the option appears. Unplug the webcam, restart, then plug it back in.
- Try a different USB port. Front-panel USB ports on desktop PCs are sometimes wired to a hub that does not supply enough power. Plug directly into a rear port on the motherboard instead.
- Disable third-party antivirus temporarily. Some antivirus tools block driver installers by mistake. Pause it during setup, then turn it back on.
- Check for a USB power management setting that turns off the port to save energy. In Device Manager, open the USB Root Hub properties, go to Power Management, and uncheck “Allow the computer to turn off this device to save power.”
In my own experience, most VX-800 problems on newer laptops come down to Windows already loading a generic driver before the LifeCam installer gets a chance to register its own. Uninstalling the device completely and then running the installer before reconnecting the camera fixes it almost every time.
Step 4: Manual Install Through Device Manager
If the automatic installer keeps failing, you can point Windows to the driver files directly.
- Download the LifeCam installer but do not run it. Instead, extract its contents using a tool like 7-Zip, or run it once and let it self-extract to a temp folder without finishing setup.
- Open Device Manager (right-click the Start button and choose Device Manager).
- Find the VX-800 under Cameras, Imaging devices, or Other devices (it may show as “USB Video Device” with a warning icon).
- Right-click it and select “Update driver,” then choose “Browse my computer for drivers.”
- Point it to the extracted folder containing the .inf file for the camera, and let Windows install from there.
- Restart once installation finishes.
Common Problems After Installing
- Camera detected but no video: Check Settings > Privacy & security > Camera and make sure both “Camera access” and the specific app you are using are turned on.
- Grainy or dark video: Open the LifeCam software (if installed) and adjust brightness manually, since the VX-800’s auto-exposure is basic by today’s standards.
- Microphone works but video does not, or vice versa: Right-click the speaker icon in the taskbar, open Sound settings, and confirm the LifeCam microphone is selected as the default input device.
- Device keeps disconnecting: This is often a worn USB cable or a loose connector. Try a different cable if the camera has a detachable one, and see this Microsoft Q&A thread on VX-800 detection issues for similar reports.

Tips to Get the Best Picture Quality
- Sit facing a light source, such as a window, rather than having it behind you, since the VX-800’s sensor struggles with backlighting.
- Clean the lens with a soft cloth. Dust buildup is common on cameras that have been stored away for years.
- Keep the USB cable away from other high-power USB devices on the same hub to avoid interference or power drops.
- If you use the camera for long calls, avoid extension cables longer than about 1.5 meters, since USB signal quality drops with distance and can cause disconnects.
Frequently Asked Questions
Does the LifeCam VX-800 work on Windows 11 without any driver install?
Yes, in most cases. Windows 11 ships with a generic UVC driver that recognizes the VX-800’s video and audio streams automatically. You only need the official LifeCam software if you want extra controls like manual brightness adjustment.
Why does my LifeCam VX-800 show up as “Unknown Device”?
This usually means a corrupted driver install or a faulty USB port. Uninstall the device in Device Manager, restart your PC, and plug the camera into a different USB port before trying the driver install again.
Can I use the LifeCam VX-800 on Windows 7 or older systems?
The VX-800 was designed around the Windows 7/Vista era, so it works fine there too, but Microsoft’s official downloads increasingly point to newer Windows versions. If you still run an older OS, look for archived LifeCam software packages, though we recommend upgrading for security reasons.
The microphone works but people say my video freezes. What causes that?
This is almost always a USB bandwidth or power issue rather than a driver problem. Try a rear USB port on a desktop, avoid USB hubs, and close other applications that might also be requesting camera frames in the background.
Is there a 64-bit specific driver I need to worry about?
The installer detects your system architecture automatically in most cases, but if you downloaded the wrong version, uninstall it completely first, then get the correct 32-bit or 64-bit package before reinstalling.
Conclusion
The Microsoft LifeCam VX-800 is old hardware, but it still works reliably on Windows 10 and Windows 11 once the driver situation is sorted out. Start with the official LifeCam software, fall back on Windows’ generic UVC driver if that installer gives you trouble, and use the manual Device Manager method as your last resort. Most people get it working within a few minutes once they know where to look.
Ryan holds a degree in Computer Science and has spent more than 20 years fixing PCs, laptops, and peripheral driver issues for friends, family, and clients across Malaysia. He writes hands-on guides at softwaredriverdownload.com based on hardware he has personally set up and tested.