I have gone through more budget gaming mice than I care to admit, mostly because I write about PC hardware for a living and I like to know if a cheap mouse is actually worth recommending or if it just looks good in a product photo. The Onikuma CW902 landed on my desk as one of those “under $20 RGB mouse” options, and after two weeks of daily use for both work and gaming, I think it earns its spot on a starter setup list. This guide covers the real specs, what the RGB and DPI buttons actually do, how to set it up, and where it falls short.
| Spec | Detail |
|---|---|
| Model | Onikuma CW902 |
| Connection | Wired USB, ~1.5m braided-feel cable |
| Sensor | Optical gaming sensor |
| DPI levels | 800/1600/2400/3200/4800/6400 |
| Buttons | 7 programmable buttons |
| Lighting | RGB breathing, 6 memory colors |
| Body size | ~125 x 78 x 41mm, ABS shell |
| OS support | Windows XP–11, Linux |
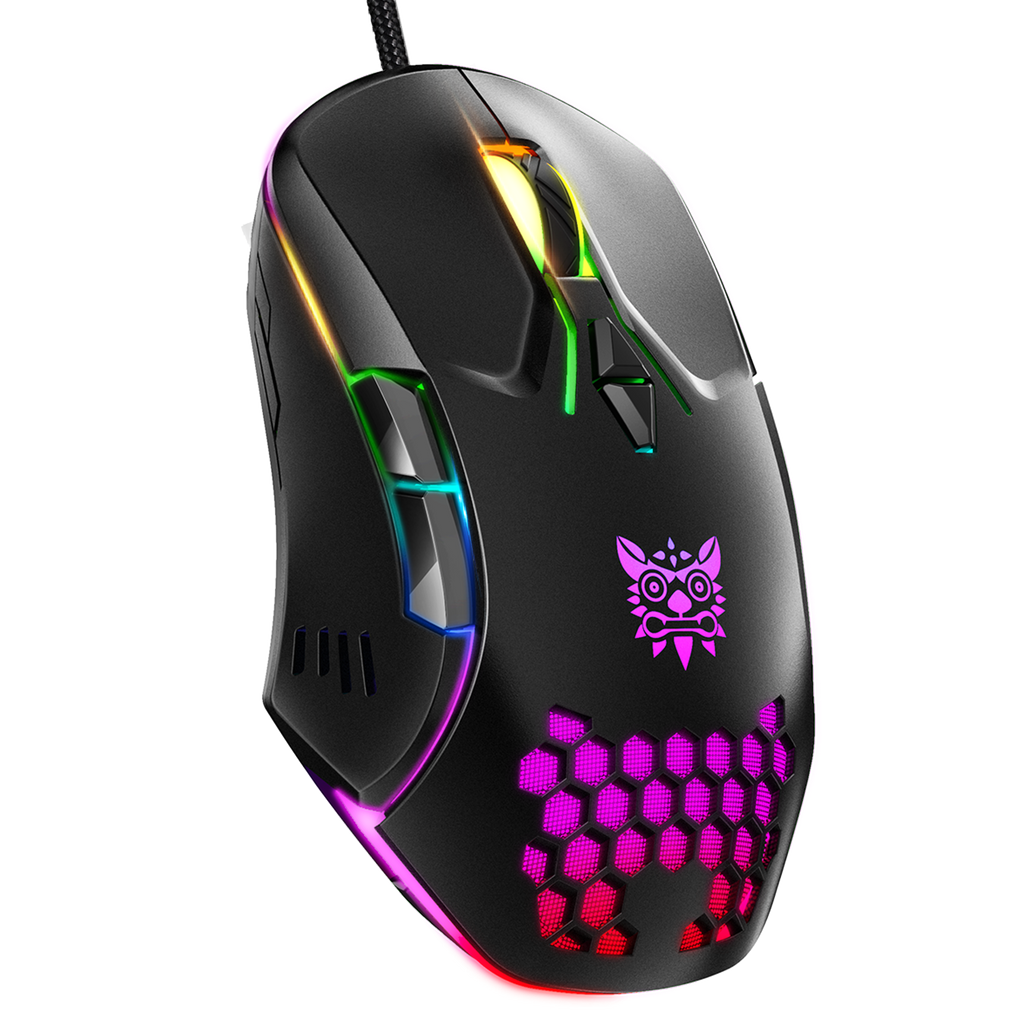
CW902 Specs at a Glance
Before getting into the hands-on impressions, here is what you are actually buying. I pulled these numbers from my own unit and cross-checked them against the listing on Onikuma’s site.
- Connection: Wired USB, roughly 1.5 meter braided-feel cable
- Sensor: Optical gaming sensor
- DPI levels: 800 / 1600 / 2400 / 3200 / 4800 / 6400, switchable on the fly with two dedicated buttons
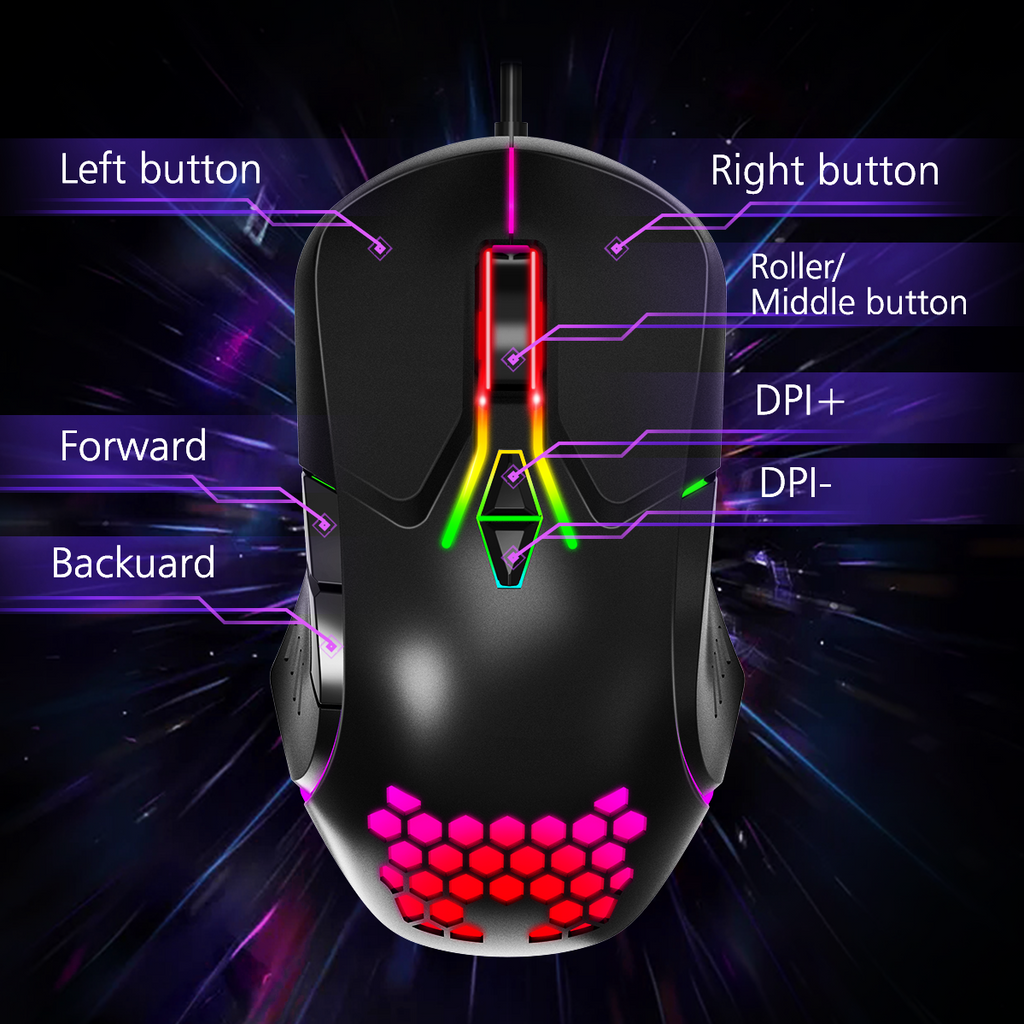
- Buttons: 7 programmable buttons total, including left, right, middle click, forward, back, and the two DPI buttons
- Lighting: RGB breathing light with 6 memory color settings, one color per DPI stage
- Body: ABS shell, ergonomic right-hand shape, roughly 125 x 78 x 41mm
- OS support: Windows XP through Windows 11, and Linux; officially no programming support on macOS
Design and Build Quality
The CW902 has a fairly standard ergonomic shape that leans right-handed. If you are a claw-grip player like me, the hump sits a little far back, so palm grip felt more natural. The side buttons are textured and easy to find without looking, which matters more than people expect once you are mid-match and reaching for a bind.
Build quality is what I would call “fine for the price.” The shell does not creak, the scroll wheel has clean, defined steps, and the two main buttons use switches that feel snappy rather than mushy. It is not going to compete with a $70 mouse on click feel, but nothing about it feels like it will fall apart in six months either.
DPI Levels and RGB Lighting
The six-stage DPI range (800 to 6400) covers pretty much every use case I tried it for. I kept it around 1600 DPI for browsing and document work, bumped it to 3200 for shooters where I wanted faster flicks, and honestly never touched the 6400 ceiling outside of testing it once out of curiosity.
What I like is the color-coded feedback. Each DPI stage lights the logo a different color, so a quick glance tells you what sensitivity you are on without opening any software. That is a small thing, but it is genuinely useful when you swap games often.
A few practical notes on the lighting and buttons:
- Press the two small buttons behind the scroll wheel to cycle DPI stages up or down.
- The color cycles automatically with the DPI stage, no manual RGB app needed for basic use.
- Programmable buttons can be remapped for macros through Onikuma’s driver software, though the mouse works fine plug-and-play without installing anything.
Setting It Up on Windows
You do not need a driver to use the CW902; Windows recognizes it immediately as a standard HID mouse. That said, if you want to remap the extra buttons or build custom macros, Onikuma keeps a downloads page for its peripherals.
- Plug the mouse directly into a USB port on your PC or laptop, not through a passive hub if you can help it.
- Check the Onikuma downloads page for the latest configuration software matching your mouse model.
- Install the tool, then relaunch it after plugging the mouse back in if it does not detect the device on first try.
- Save your DPI and button profile; some versions of the software store settings on the PC rather than onboard memory, so they will not follow the mouse to another computer.
If you only care about basic use, RGB colors, and DPI switching, you can genuinely skip the software altogether. I used mine for a full week without installing anything and had zero issues.
Everyday and Gaming Performance
For office work, the CW902 tracks smoothly and the scroll wheel is precise enough for spreadsheet work without overshooting rows. For gaming, I ran it through a mix of a competitive shooter and a MOBA over several sessions.
Tracking felt consistent, with no noticeable jitter or acceleration at the DPI stages I actually use. Click latency was not something I could distinguish from mice twice the price in casual play. Where it does show its budget roots is in the cable, which is a bit stiffer than premium paracord cables, so drag on the mouse pad is slightly more noticeable during fast flicks.
Where It Falls Short
Nothing here is a dealbreaker, but worth knowing before you buy:
- No onboard memory confirmation across all firmware batches, so profiles may reset if you switch PCs without the software installed.
- Cable is functional but stiffer than higher-end braided cables.
- Software is basic compared to major gaming brands, though it covers the essentials.
- No official Mac programming support, so button remapping is Windows/Linux only.
When the Mouse Won’t Connect or Buttons Misbehave
Most CW902 problems trace back to a loose USB connection or a software profile that did not save, not a defective mouse. Work through these checks before assuming the unit is faulty.
Windows Does Not Detect the Mouse at All
- Unplug the mouse and try a different USB port directly on the motherboard or laptop chassis, skipping any USB hub or extension cable, which can sometimes fail to pass enough power for the RGB lighting and sensor together.
- Check the cable near the strain relief close to the mouse body for visible damage, since this is the spot that flexes the most during daily use.
- Try the mouse on a second computer. If it lights up and tracks there, the problem is with the original USB port or its drivers, not the mouse.
DPI Button or RGB Color Stops Responding
- Unplug the mouse for about ten seconds, then reconnect it. This resets the onboard firmware state without needing any software.
- Reinstall the configuration software from the Onikuma downloads page if a custom profile seems stuck, since a corrupted save file can lock the DPI stage or lighting pattern.
- Confirm the software is actually running in the background; some versions need to stay open to keep custom macros active, unlike DPI color cycling, which works standalone.
Alternate Manual Pathway: Skip the Software Entirely
If the configuration software will not install or keeps crashing, the CW902 still works as a fully functional mouse without it. Unplug any partially installed software, restart the PC, and plug the mouse back in. Default DPI switching and RGB color-per-stage still function through the onboard buttons alone, so you only lose macro remapping, not basic day-to-day use.
FAQ
Does the Onikuma CW902 need a driver to work?
No. It works as a plug-and-play USB mouse on Windows and Linux. A driver is only needed if you want to remap buttons or build custom macros.
What is the maximum DPI on the CW902?
6400 DPI, with five additional stages below it (800, 1600, 2400, 3200, and 4800) that you can cycle through with the dedicated DPI buttons.
Is the CW902 good for competitive gaming?
For casual and mid-level competitive play, yes. The sensor tracking is consistent and the button layout is comfortable. Serious esports players chasing the lowest possible latency will likely prefer a higher-tier sensor, but for most people this is more mouse than they need at this price.
Does it work on macOS?
Basic plug-and-play mouse functions work on macOS, but Onikuma does not officially support button programming or the configuration software on Mac.
Conclusion
The Onikuma CW902 is a solid pick if you want RGB lighting, a wide DPI range, and seven programmable buttons without spending much money. It is not going to dethrone flagship gaming mice, but for students, casual gamers, or anyone building a first battlestation, it covers the basics well and looks a lot more expensive than it is.
Written by Marcus Webb, a PC hardware reviewer based in Austin, Texas, with a computer science degree and about a decade of experience testing peripherals for budget gaming builds.