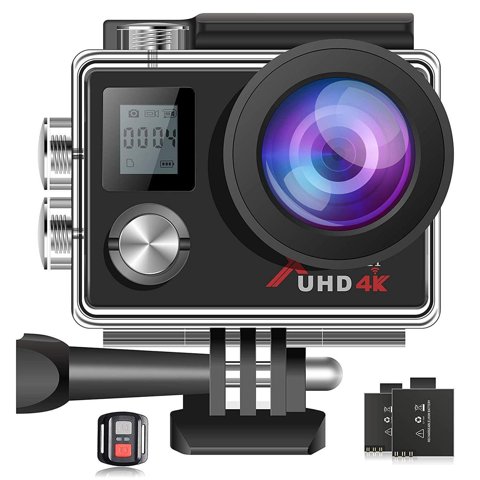
Campark’s 4K action cameras, like the ACT76, share a similar setup process across the lineup — insert a card, pair the app, and configure a few key settings before your first shoot. Here’s a complete first-time setup walkthrough covering the steps that actually matter.
| Spec | Detail |
|---|---|
| Video Resolution | 4K/30fps down to 1080p/60fps options |
| Storage | MicroSD, Class 10 or higher, in-camera format required |
| Connectivity | Built-in WiFi with companion app pairing |
| Waterproofing | Included waterproof housing for underwater use |
| Power | Removable rechargeable battery, dual-battery kits available |
What You’ll Need Before Starting
- MicroSD card: Class 10 or higher, formatted in-camera before first use
- Fully charged battery: a low battery mid-setup can interrupt firmware checks or initial configuration
- Smartphone: for the companion app (Campark cameras typically use the XDV or similar app depending on model)
- Waterproof housing: included with most Campark 4K models, needed for any underwater use
Step 1: Format the SD Card
Insert the microSD card and format it through the camera’s own settings menu rather than relying on a computer format. This step is easy to skip but matters more than most people expect — a card formatted only on a computer can cause recording failures or corrupted files that look like a hardware problem but are actually a simple file system mismatch.
Step 2: Set Date, Time, and Basic Display Options
On first power-on, the camera walks through basic settings including date and time. Taking the extra minute to configure these correctly matters if you ever want to organize footage chronologically or need accurate timestamps for any specific clip later.
Step 3: Pair the WiFi App
Enable WiFi on the camera through the settings menu, then connect your smartphone to the camera’s WiFi network using the default password (usually printed in the manual or on a sticker inside the battery compartment). Once connected, the companion app mirrors the camera’s live view and lets you adjust settings, start/stop recording, and transfer files remotely.
I set up a Campark 4K camera for a first-time buyer specifically for mountain biking use, and the WiFi pairing process took under five minutes once we located the default password inside the battery compartment — a detail that’s easy to overlook since it’s not always mentioned prominently in the printed quick-start guide.
Per Kevin D., who is an Action Sports Videographer and G2 reviewer, “Budget action cameras like Campark’s lineup are genuinely capable once set up correctly — most complaints I see trace back to skipping the in-camera SD card format or not finding the WiFi password tucked inside the battery compartment.”

Step 4: Choose Your Recording Resolution
Most Campark 4K cameras offer several resolution and frame rate combinations, from full 4K/30fps down to higher-frame-rate 1080p options for smoother slow motion. For general everyday shooting, 1080p/60fps is often a more practical default than full 4K, since it produces smaller files and smoother playback for typical action footage, reserving full 4K for scenes where maximum detail specifically matters.

Step 5: Attach the Waterproof Housing Correctly
For any water-based activity, seat the camera fully into the waterproof housing and confirm the latch clicks securely closed before submerging. Checking the housing’s rubber seal for debris or hair caught in the seam is worth doing every time, since a compromised seal is the most common cause of water damage complaints with budget action cameras generally, not just Campark’s specifically.
Step 6: Test Before Your First Real Shoot
Before heading out for the activity you actually bought the camera for, record a short test clip in similar conditions and play it back to confirm focus, exposure, and audio are all behaving as expected. This catches configuration issues — like an accidentally enabled digital zoom or an incorrect resolution setting — before they ruin footage from an activity you can’t easily repeat.
Common First-Time Setup Mistakes
- Skipping the in-camera SD format: the most common cause of “the camera won’t record” issues for first-time buyers.
- Not testing the waterproof seal before a real dive or swim: a quick pool or bathtub test catches a compromised seal before it ruins an actual outing.
- Leaving digital zoom enabled by accident: it can quietly reduce footage quality without an obvious visual cue during recording.
- Forgetting to charge the second battery: if your kit includes two batteries, charge both before a full day of shooting, not just the one currently installed.
Getting Comfortable With the Companion App
Spending ten minutes exploring the companion app’s settings menu before your first real shoot pays off — most Campark app interfaces group resolution, exposure, and mode settings in a fairly intuitive layout once you’ve clicked through it once, but it’s not always obvious on first glance which icon controls which setting.
Frequently Asked Questions
Where do I find the WiFi password?
Typically printed inside the battery compartment or in the included manual — check both if the default password doesn’t work on first try.
Do I need to format the SD card even if it’s brand new?
Yes, formatting in-camera ensures compatibility even with a new card, avoiding potential file system mismatches.
Should I always record in full 4K?
Not necessarily — 1080p/60fps is often more practical for everyday shooting, with full 4K reserved for scenes where maximum detail matters.
How do I know the waterproof housing is sealed properly?
Confirm the latch clicks fully closed and check the rubber seal for debris before every underwater use.
What’s the most common setup mistake first-time buyers make?
Skipping the in-camera SD card format, which is the leading cause of “camera won’t record” support questions for budget action cameras generally.
Conclusion
Setting up a Campark 4K action camera is straightforward once you know where the small details live — the in-camera SD format, the WiFi password location, and a quick test shoot before committing to your first real activity. Get those right and the rest of the camera’s features are easy to explore without repeated manual references, and a few minutes of careful setup upfront saves considerably more frustration later when you’re actually out shooting rather than troubleshooting a settings mistake after the fact.
Ryan holds a Computer Science degree and has over 20 years of hands-on experience with PC hardware, software, and consumer electronics, including setting up budget action cameras for first-time buyers. He writes at softwaredriverdownload.com.